|
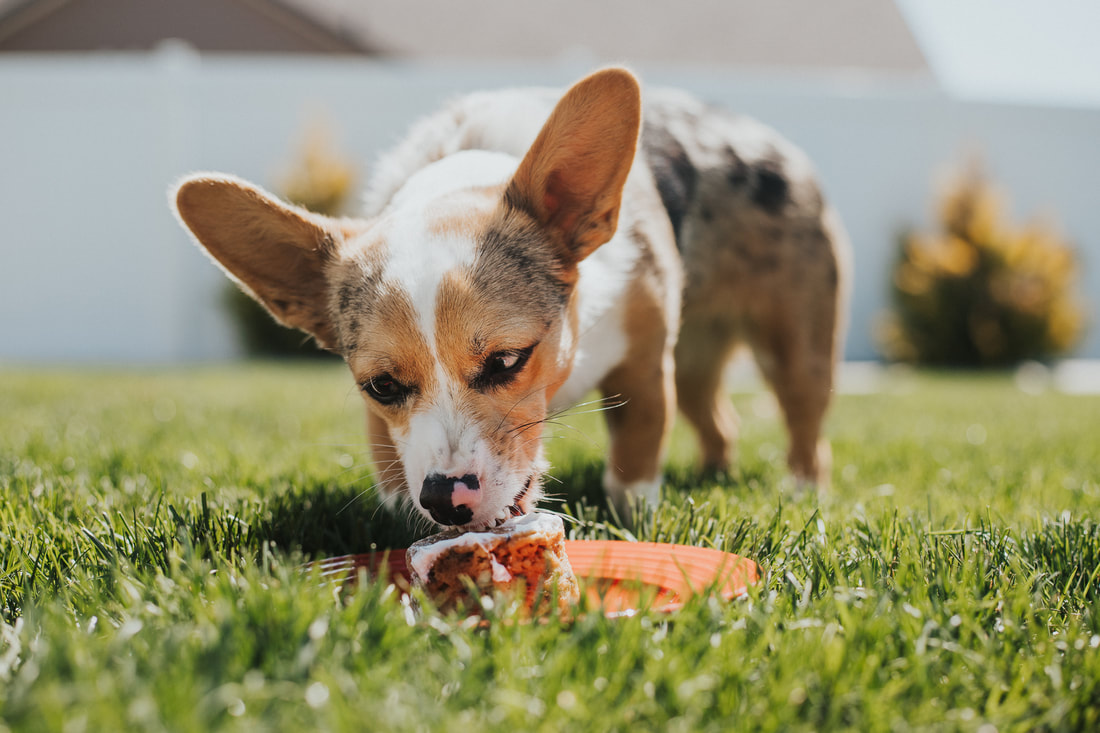
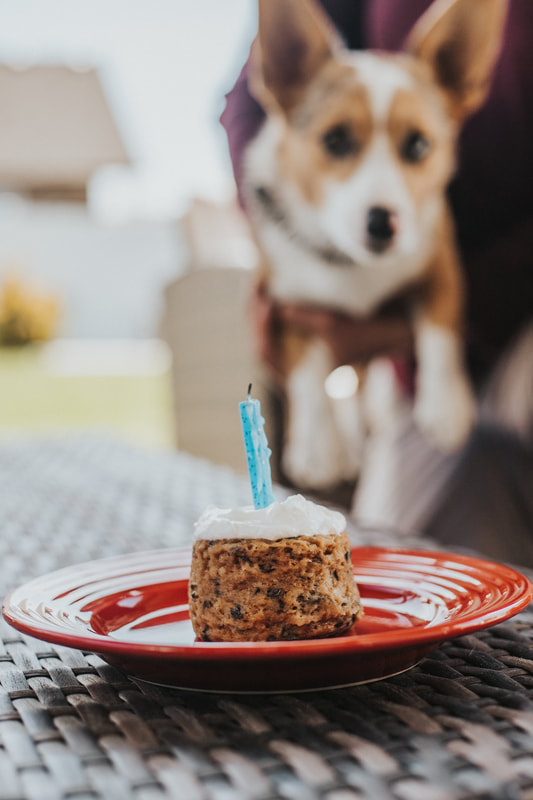
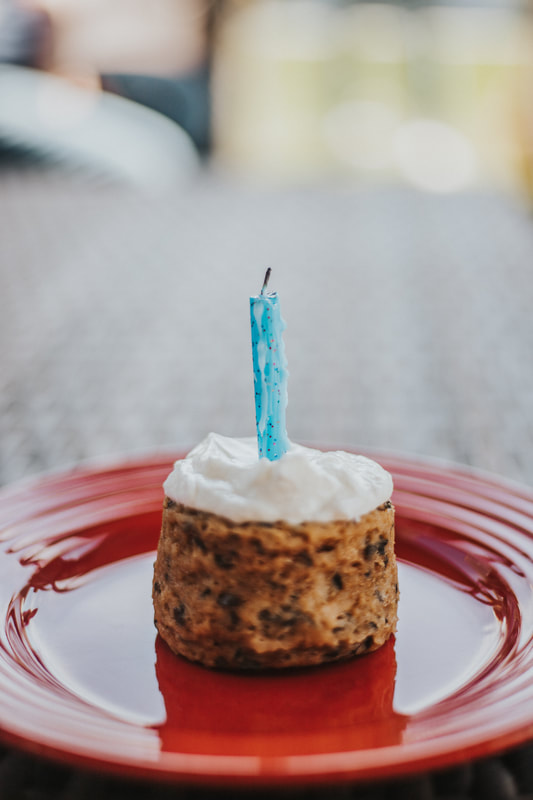
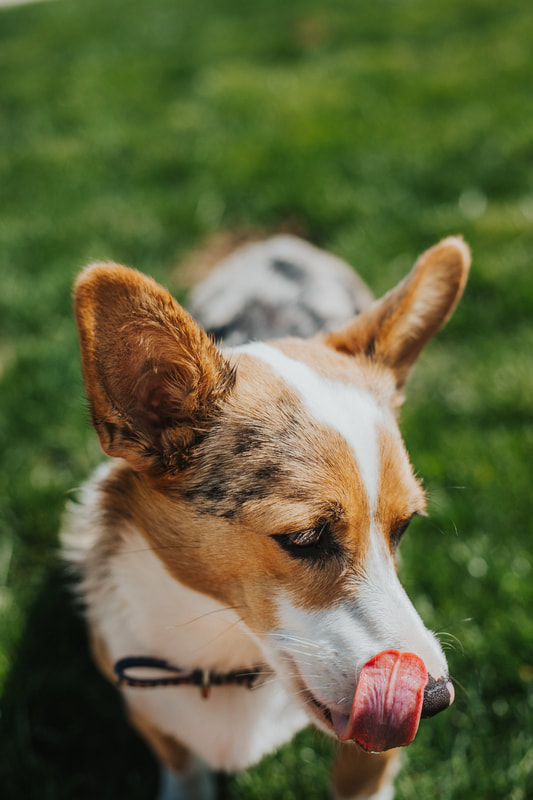
Happy birthday to our first pup child Sophie! We're so glad we got her and we're thankful for her cute self everyday. 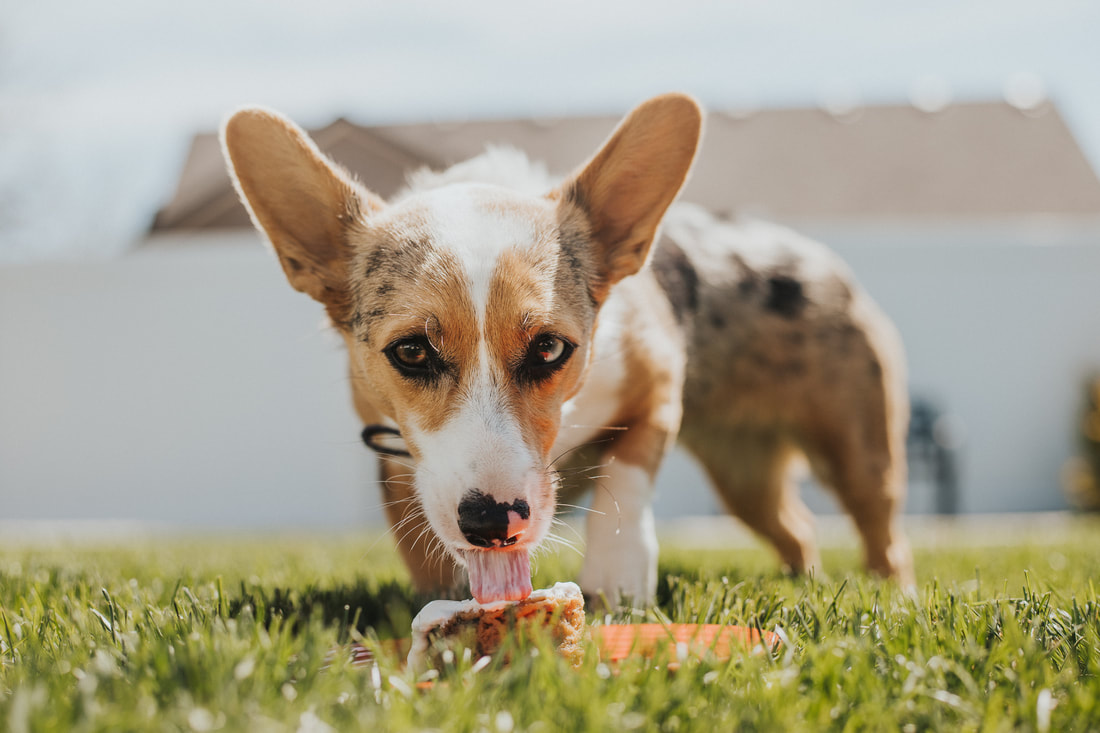 We obviously made her cake for a cake smash. She was on cloud 9. I just found a recipe on Pinterest for ingredients but it didn't have portions. Ingredients: egg, shredded apple, peanut butter, baking soda, and non-fat, plain Greek yogurt Proportions: 1 egg, 1 apple shredded, around half a cup of peanut butter, one egg, and a personal size of yogurt. This just happened to be the proportions I threw together. It ended up being enough for two cupcakes that were the size pictured. I gave the other one to the other pup. I then microwaved it in a mug for 1 minute and 30 seconds. I let it cool before I spread the yogurt like frosting.
0 Comments
Happy Earth Day! I’ve always loved Earth Day and I wanted to take this opportunity to share some steps to take to help make the Earth a bit healthier. One of my favorite quotes that has emerged recently is that we need millions helping the planet imperfectly not a few helping perfectly. We are a prime example of a couple that is imperfectly helping the planet, always trying to improve, and just doing our best. 
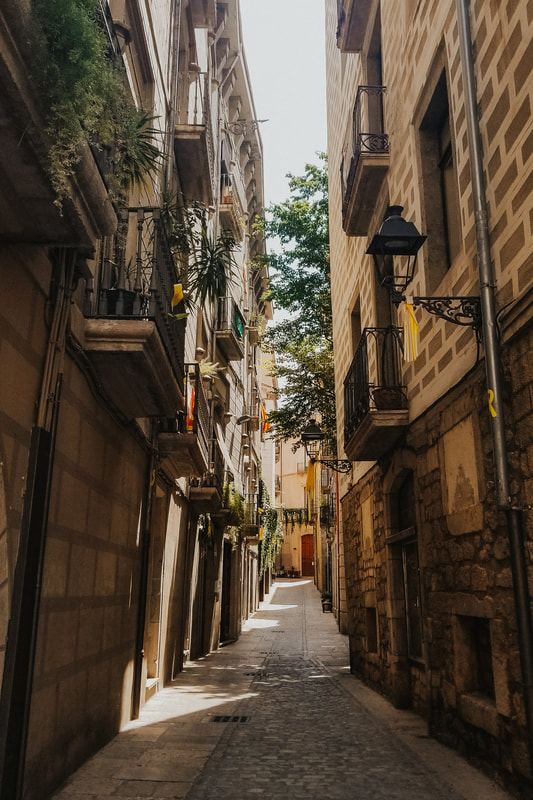
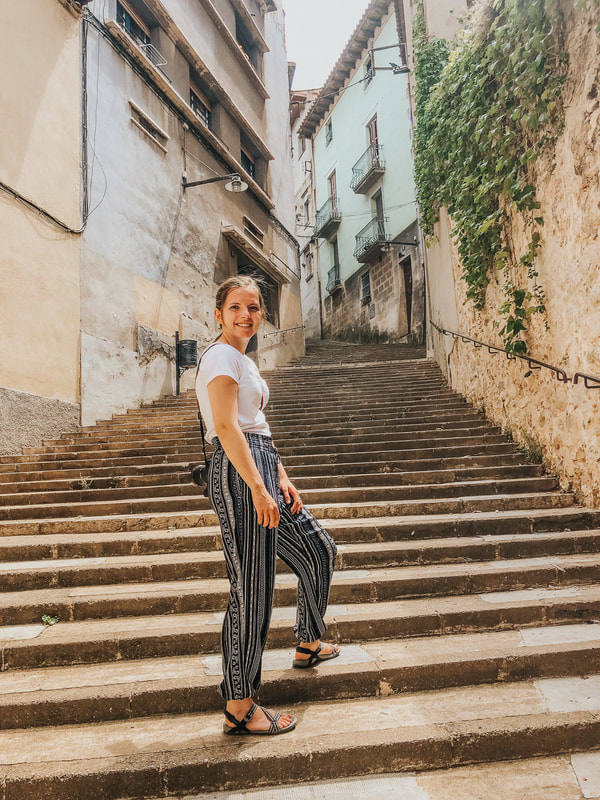
Most importantly, keep up the work. It is worth it even if you feel as though your contribution is small. First off, you’re not alone. There’s millions of people taking baby steps like you. They’re making the small changes and working towards a more sustainable future. Second, you’d be amazed what your impact is if you really look. For example, I drink around 2 water bottles worth of water a day. That means I save 730 water bottles a year. I could easily use 2 plastic bags per work day which means I save around 380 plastic bags a year. These are baby steps but they really add up. Don’t let the gloom and doom statistics get you down. Do what you can and that’s all you can do. We all need to push for a more sustainable future but you can’t single handedly solve climate change. Focus on what you can control and contribute to. Do all you can and encourage others (friends all the way up to politicians) to do the same. Just keep fighting and as a team, we can change our future.  If you’ve ever spent more than ten minutes talking to me, you almost certainly know I spent a semester living abroad in Spain. I’m annoying about it- I’m definitely the “this one time when I was in Spain” kind of guy. So bear with me, while I tell you about this one time, while I was living in Spain… I was in Toledo. It’s your perfect Spanish tourist city. It was, like many medieval cities, built on a hilltop, so as to be defensible. It has cool old walls, a fantastic cathedral, a Roman palace that was rebuilt after being destroyed in the Spanish Civil War. The streets are typical narrow, cobbled European walkways, lined with shops, bars, and cafes. I loved it there, and I strongly recommend to anyone who happens to be in Madrid to go there and visit, if you have an extra day to kill. While I was in Toledo, I spoke with a person who complained about “touristy” areas. We were in a great restaurant (which I will unfortunately never remember the name of), and this person commented on how they were glad to be somewhere less touristy. They liked to see how the locals lived, what people in Toledo did for fun. Which is totally natural, right? Except, the way that person used the word “touristy” graded on me. He said it like it was a mark of shame, that being “touristy” was the worst thing a place can be! The problem is, if you like to travel, you cannot avoid “touristy.” If you walk through Pike’s Place Market, Time’s Square, Montserrat, Banff, or the Colosseum, there will be people trying to sell you junk, rude tourists blocking views and taking selfies, and huge tour groups that you always seem to get stuck behind. But why? Because those places are interesting! If you are there, it’s because you have heard of it before, right? You chose to go there just like everyone else. You are the “touristy”. I would encourage everyone to seek out local experiences and touristy spots. Miki and I once ate pastries at a deserted bakery on a rainy morning in Paris and it was beautiful. Later that same day, we visited Shakespeare and Company, the most touristy bookstore in all of Paris, and that was wonderful too! But when you do go somewhere cool, and you describe it to someone as “touristy”, please don’t use that word as a swear word. Because it's ok if it’s touristy! Touristy means incredible sights and excellent food (seriously, places with lots of tourists have the best restaurants). Touristy means people making money, earning their livelihood. Touristy means thousands, even millions of people before you have visited a place and enjoyed it enough that word of their enjoyment has reached you, and spurred you along. Miki’s family used to road trip a lot when they were kids. Her dad wore a one-strap bag that he got for free from the Idaho Digital Learning Academy, filled with water bottles, which he called his “European satchel”. He’s also been known to cut quite the figure in his camouflage fishing hat and stuff disposable water bottles in the pockets of his cargo shorts. Miki and her sister would always tease him, saying “Dad, you look like such a tourist.” He’d always respond, “I am a tourist.” If you visit somewhere new, cool or exciting, remember that you are a tourist. You are the reason the place is touristy. And that’s never a bad thing. 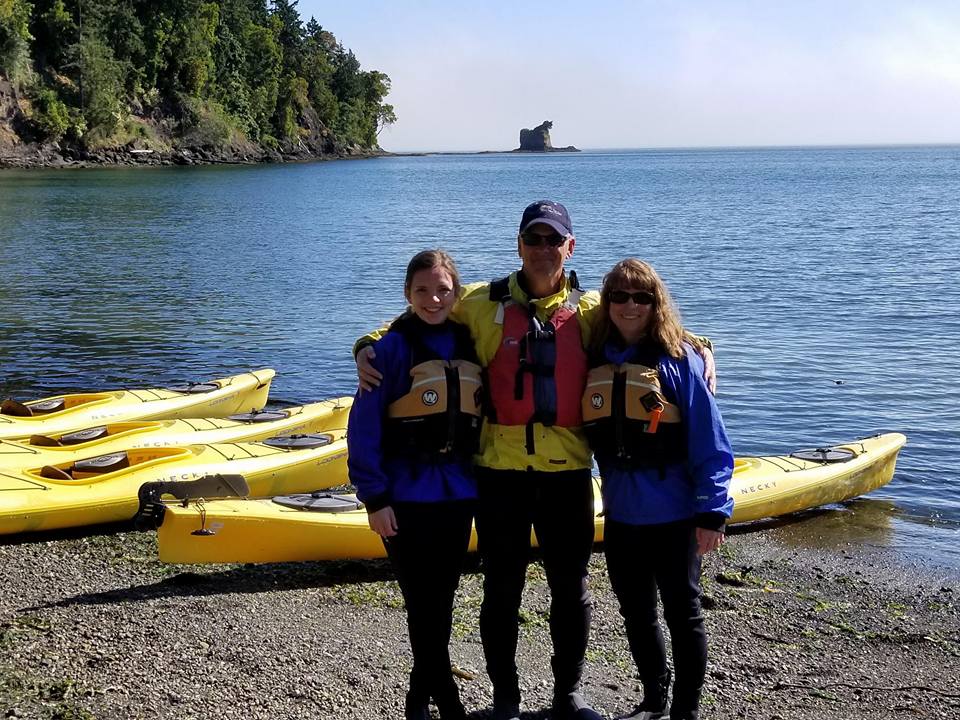 Miki's family in full tourist mode 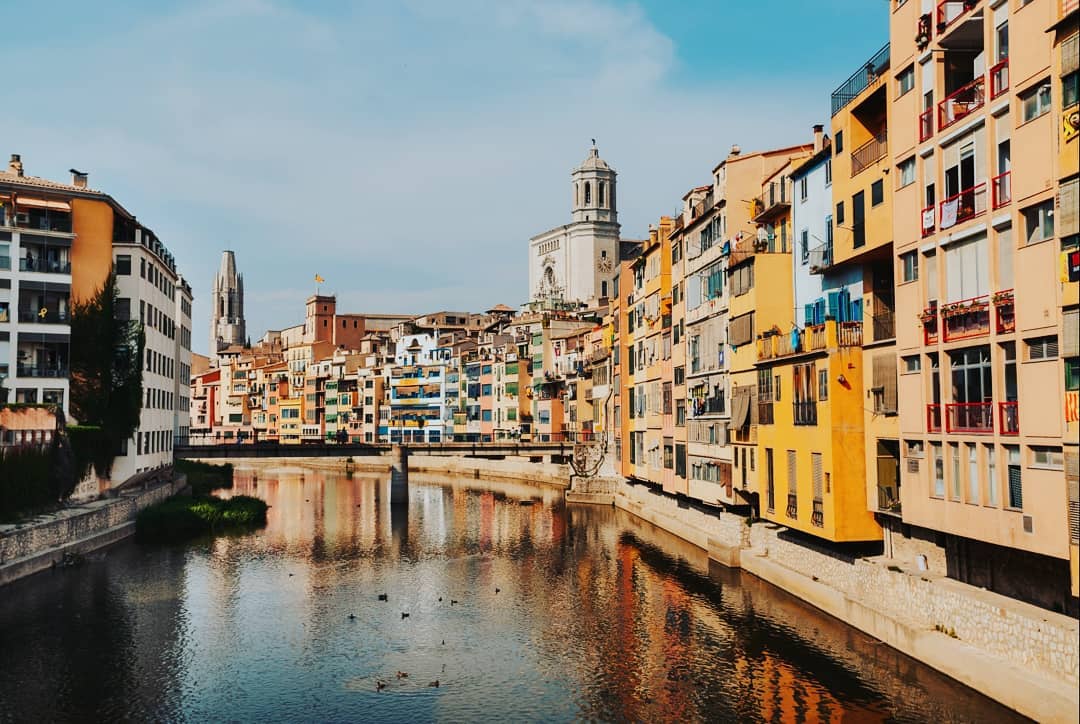 Girona was incredible. I lived in Spain for 4 months when I was a junior in college, studying Spanish at the Universitat Polytècnica de València. During that time, I traveled around the country a little bit: I saw the Palacio Real in Madrid, the Alhambra in Grenada, La Ciudad Encantada in Cuenca, and the Roman aqueducts in Segovia and Tarragona. But nothing I have done so far in this country was more enjoyable than Girona. I have a few different kinds of things I like in Spanish cities. I like modernity, clean sidewalks, a functional transit system. I like ancient, narrow streets running uphill towards cathedrals, crowded on either side by stunning balconies. I like a city built on hills so that you can find a high point from which to view the whole thing. And I like a city which is hospitable to tourists. The reason Miki and I had so much fun in Girona was because it had all of those things. It was beautiful, it was ancient, it was modern, it was touristy. The food was excellent, the deserts were to die for, and the views blew us away. If you are staying in Barcelona and have a free day you don’t know what to do with, please, please go to Girona. I promise you won’t regret it, even if you don’t like it as much as we did. Our day did not start off excellent, if I’m being honest. Miki and I rose early in the morning and arrived at Barcelona Sants, the main train station in Barcelona, at around 8:20 for the train that would leave for Girona at 8:25. After finding our seats and sitting on the train for about 40 minutes, the train staff announced (in Spanish and Catalan only, no English) that, due to mechanical problems, the trip to Girona was cancelled. If Spanish is your second language, you might know how difficult it can be to understand announcements over an intercom, so I wasn’t really all that sure what was going on until a kind man informed us, in English, that we needed to make our way to platforms 13 & 14. After a stressful 10 minutes of trying to figure out if that man was correct, Miki and I were waiting atop the escalator to go down to the platforms. From the bottom of the escalator we heard a bunch of shouting- we found out later that the platform had been completely packed with people, and that the escalator was pretty much just shoving people into one another. Luckily we avoided that mess, and found ourselves waiting on a hot platform with a few hundred people, none of whom knew how exactly we were going to get to Girona. Renfe ended up cancelling a few other trains, specifically one that was going to carry people onto France. We met some Americans who were trying to get to Leon, others who were on their way to Paris, and a couple who, like us, were heading to Girona. We stuck together for the most part, working together to try to get onto the right train. Eventually, we all boarded a Rodiales line headed for Girona. Rodiales is a short-distance, multi-stop train system operating in the Autonomous Community of Catalonia. It did eventually get us to Girona- about 3 hours after we had originally planned. From that point onward, our day was incredible. It’s possible to take public transport into the old part of the city, but Miki and I just walked. The route took us through very stereotypical narrow European cobbled streets. Our first stop of the day was La Fabrica, a coffee shop owned by a couple of expats from Germany and Canada living in Girona. It was some of the best food we had when we were in Spain- I got the pulled pork sandwich with mango salsa, and Miki got a breakfast sandwich with egg, ham and cheese. She actually ended up being pretty jealous of my sandwich. If you are in Girona and looking for a place to have a cup of coffee or some excellent brunch, we cannot recommend La Fabrica enough. 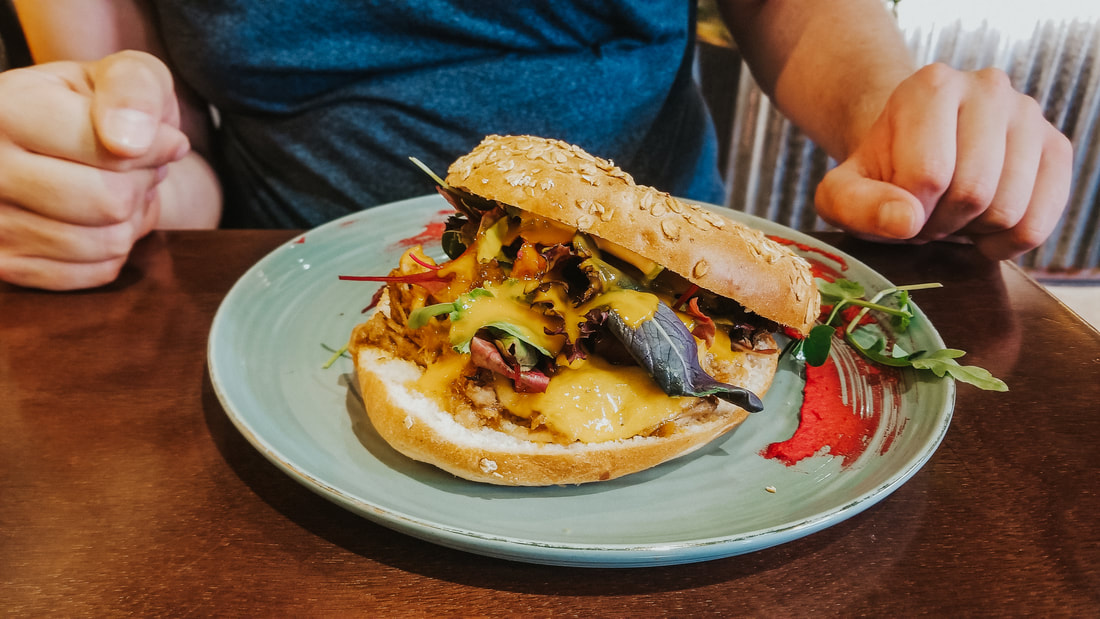 The pulled pork sandwich 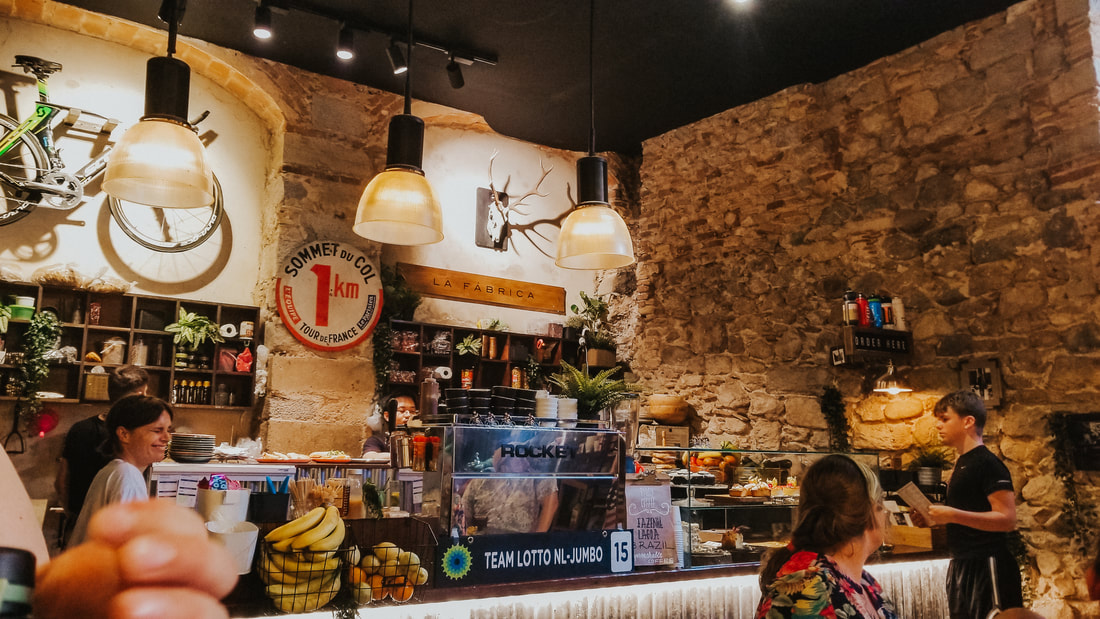 La Fabrica interior
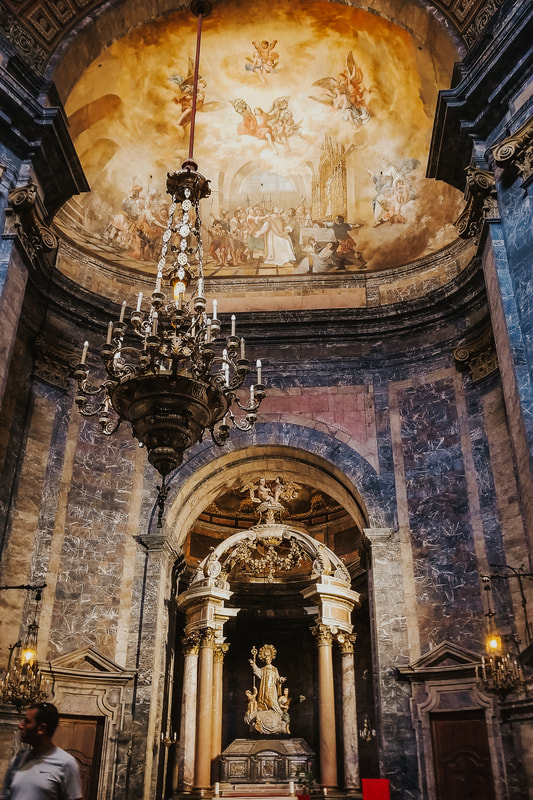
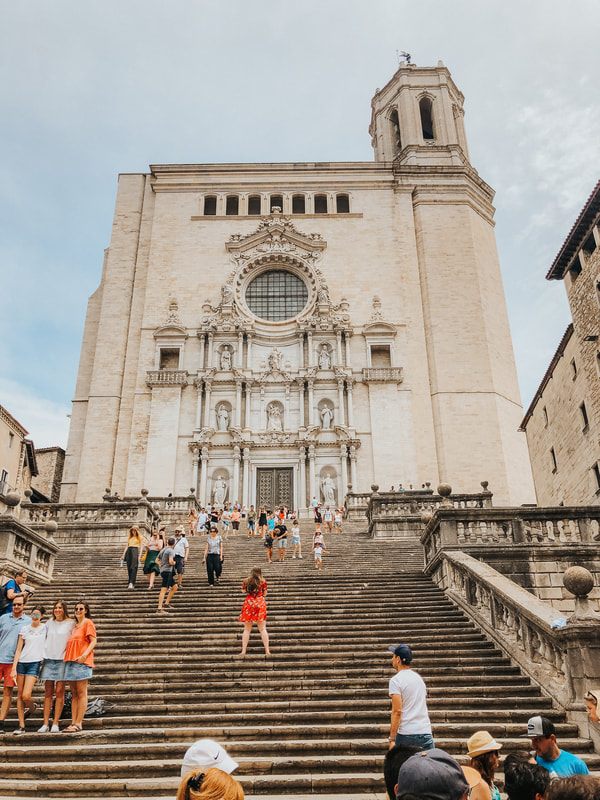
From there our day took us to the Girona Cathedral, which, while not the most impressive church i’ve seen in Europe (the Pantheon and la Sagrada Familia are pretty close to that honor) it was pretty cool, and the stained glass was likely worth the visit- some of the more ornate, beautiful designs I’ve seen. From there we walked to the Basilica sant Fileu, which, while not quite as impressive as the Cathedral, was still worth a look, for its tower if nothing else.
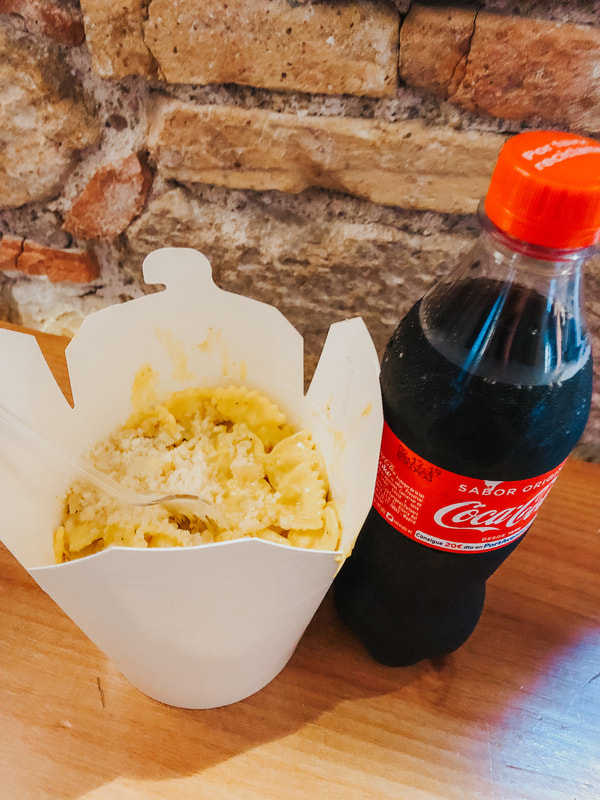
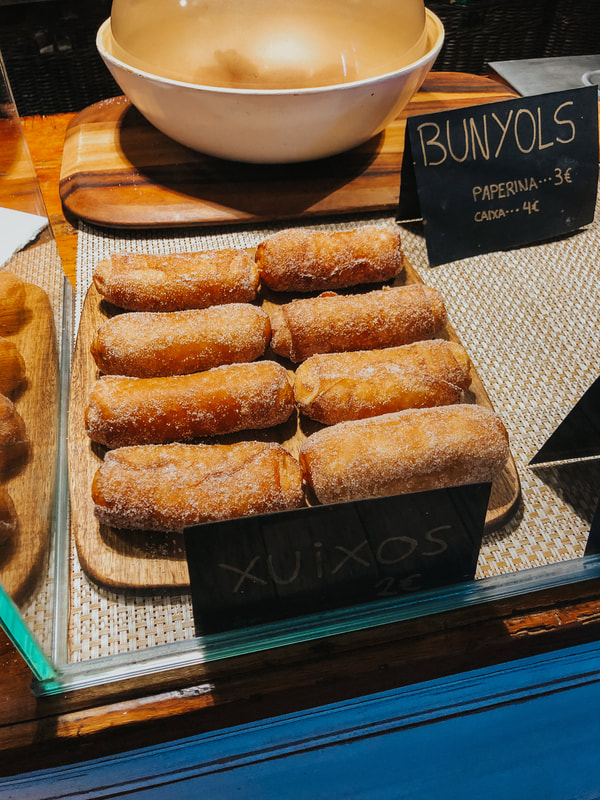
Later in the day, we visited the old city walls, which have a wonderful view of Girona. We had bought some fans earlier in the day, which saved our lives up on the walls: direct sunlight in July in Spain is hot. After the walls, we walked back down into the city and along the river, where we stopped to have a glass of Coke at a small riverside bar. That was actually one of the best parts of the day- yes, Coke is available everywhere, but there was something peaceful about sitting at a table by the river, in the shade of some trees, sipping Coke because it was cold and the day was hot. Take breaks when you travel! Nothing wrong with buying a drink and kicking back to recharge for the rest of your day. 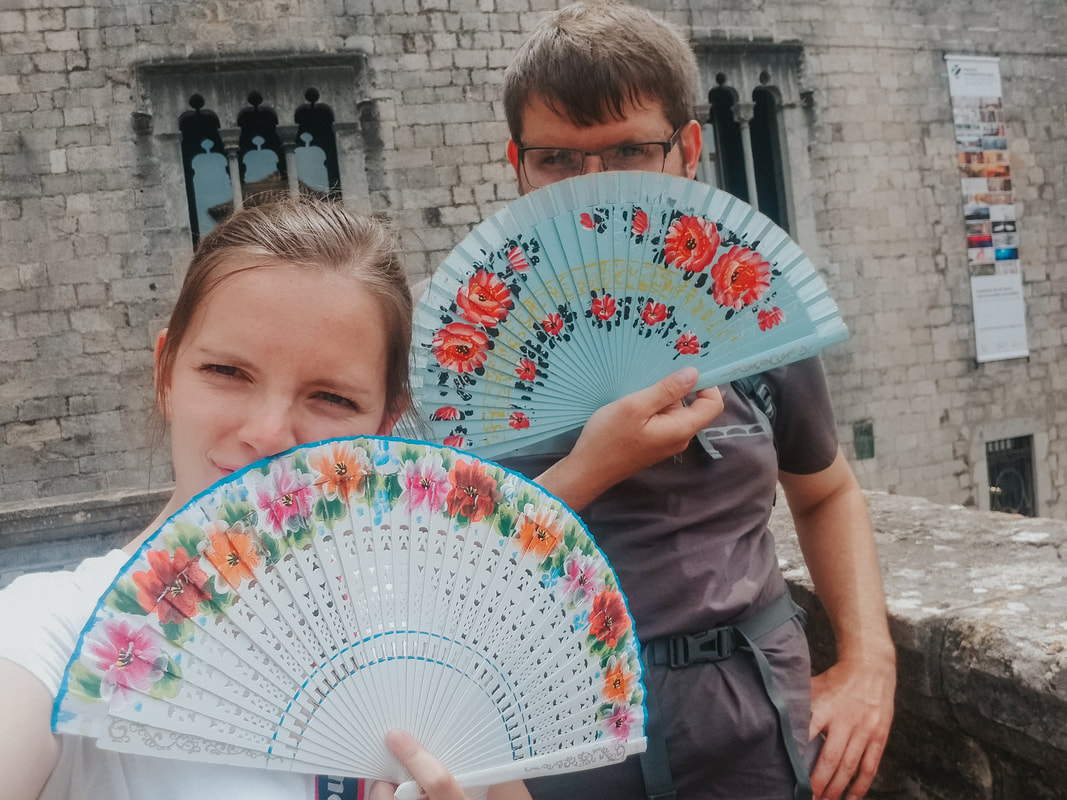 These fans are life savers and a good souvenir 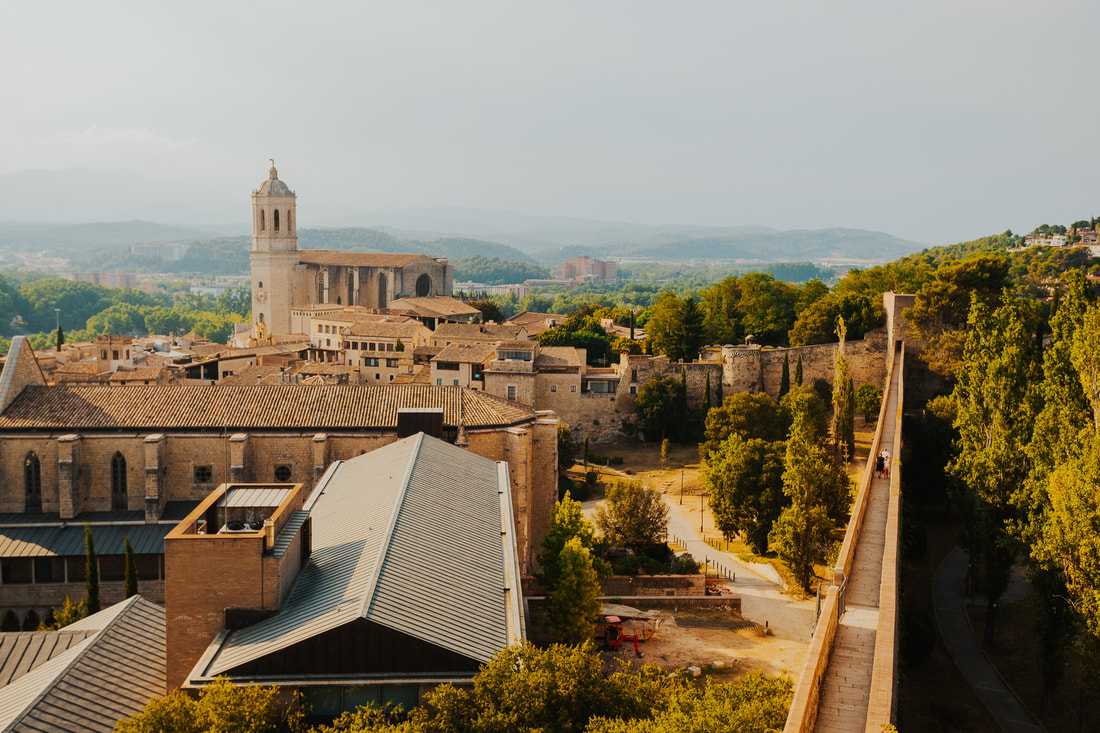 View from the medieval castle walls 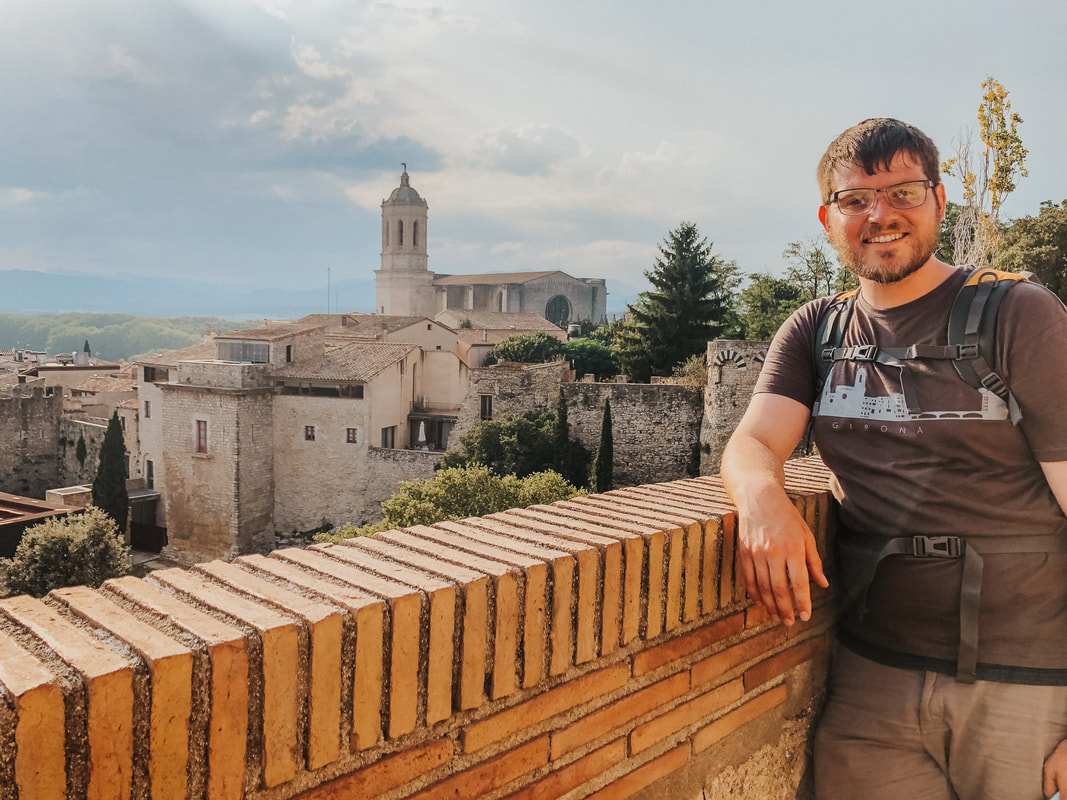 After our break, we found some good gelato (we found a lot of that on our honeymoon), and I bought a Spanish copy of National Geographic. Then, after some great photos on the city’s famous bridges (including one of my favorites Miki has ever taken, the first photo of this post), it was finally time for some book shopping. 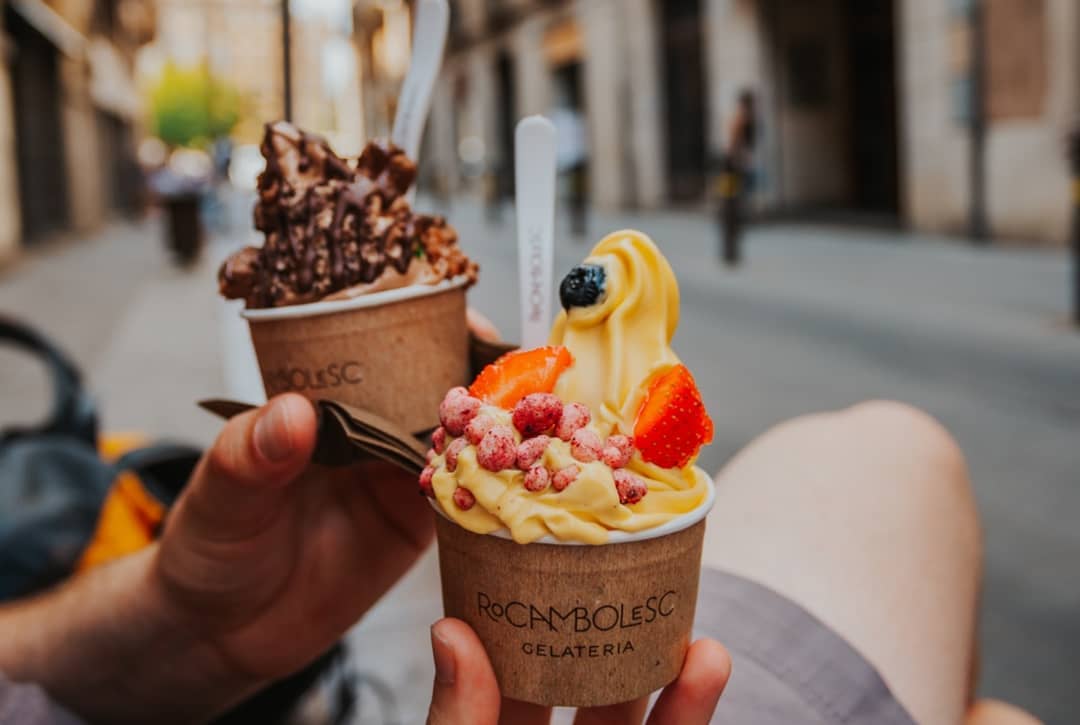 One of our favorite gelato places of the trip 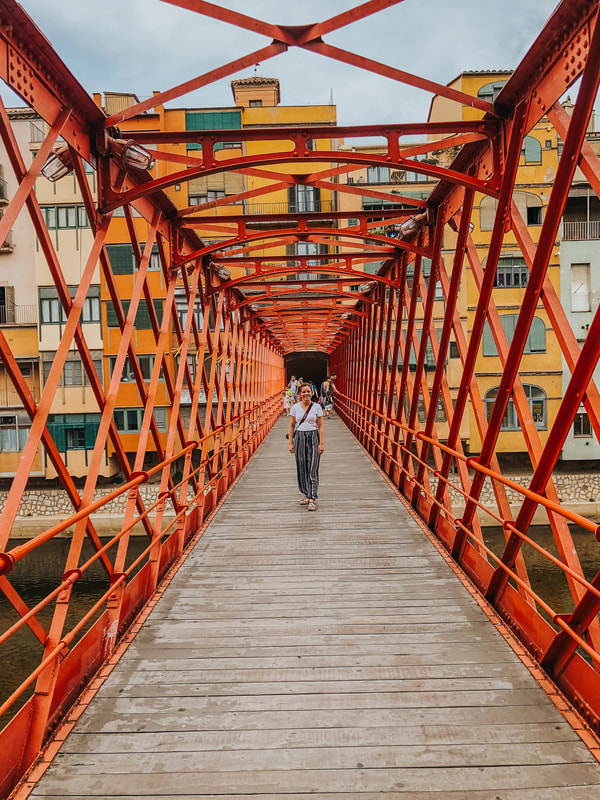 The bridge to see the view from the first photo I had this idea of collecting a copy of Harry Potter and the Order of the Phoenix in the language of every country I visit. It's my favorite book in the series for a multitude of reasons. I have long since given up that idea as impractical, but I still felt drawn to a copy of the book translated into Catalan, the language native to the Autonomous Community of which Barcelona is the capital. Libreria Geli was where Miki bought me my copy of HP5 in Catalan. I also took some time to chat with a worker at the bookstore- one of my only significant conversations in Spanish while on our honeymoon, and he helped me find a stack of books that would be suitable for my students back home. After the bookstore, we had dinner at Unicorn, a nice little pasta place, where we also tried Xuixo, a pastry famous in Girona- we definitely recommend Xuixo if you get the chance. Finally, it was time to go back to Barcelona and get some rest. Except, it took us hours to get back to Barcelona. Because we had train troubles again. We sat around, reading in the train station, for three hours. Two trains back to Barcelona were cancelled- we never found out why. We did eventually make it back to Barcelona, to our AirBNB. And we came to a conclusion: We adored Girona. And we hated the trains in Spain that day.
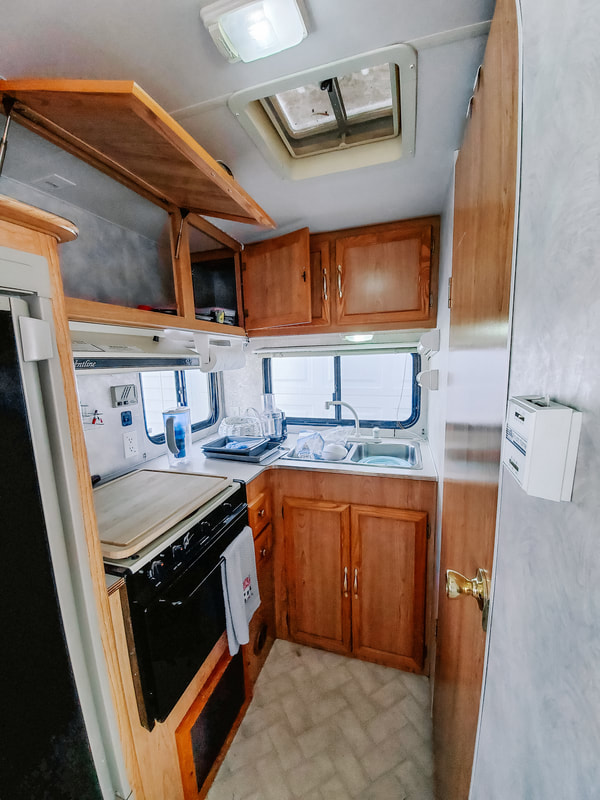
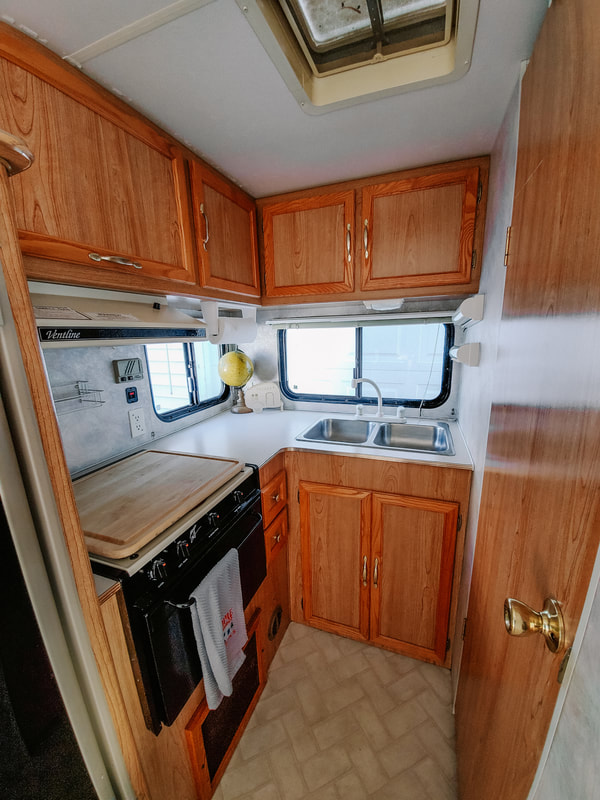
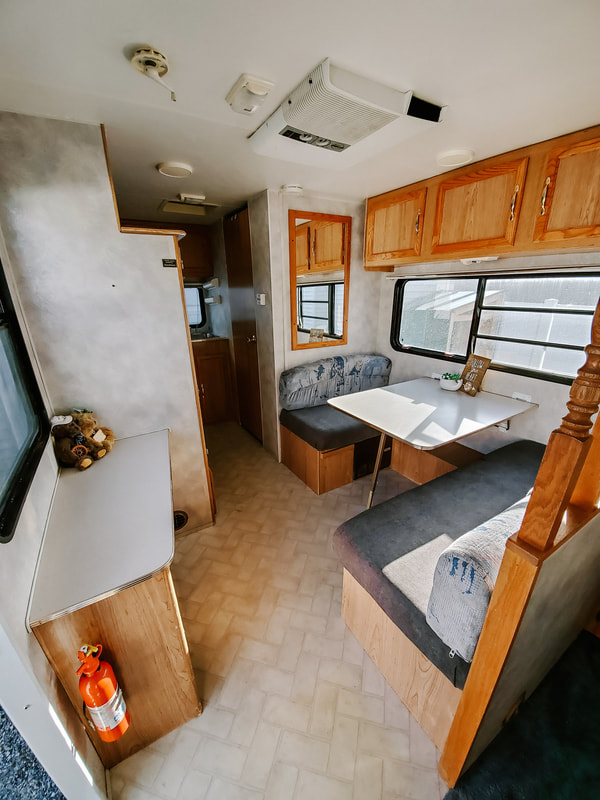
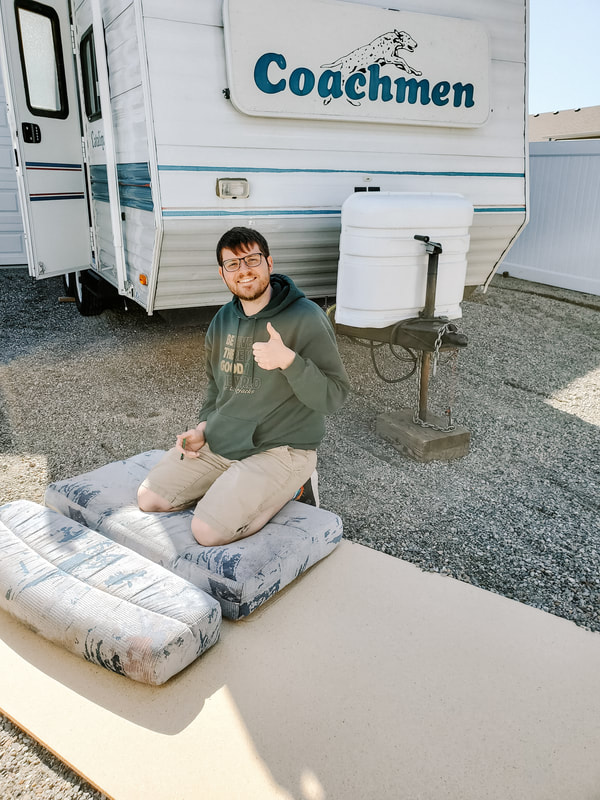
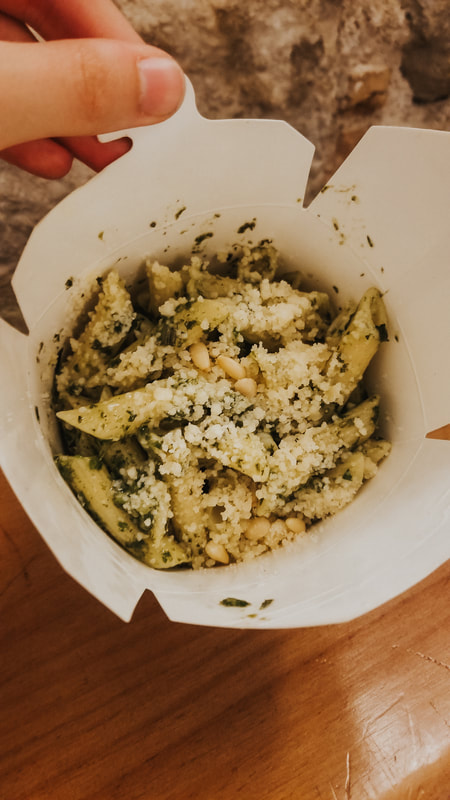 Ziti with pesto and parmesan Considering we’re all stuck in quarantine, I decided to put together a video of how I edit photos. The goal here is to show what I look at when I’m adjusting a photo, explanations for why I do what I do, and some things I’ve found that work well for me. This isn’t my favorite edit or favorite photo I’ve ever taken but it still shows you the process. This also isn’t exactly tutorial status. It’s basically just me narrating what goes on in my head while I edit a photo. So if you don’t have some basic knowledge of Lightroom, this video may be a bit too fast. Anyways, enjoy the video! I hope it gives you some ideas and inspiration. We've posted lots of times about the 1996 Coachmen Catalina we bought last year. We honestly have only used part of its RV abilities. All last summer, we used it as a fancy tent with electricity. We've slowly been learning the ropes of RVing. And let me tell ya, there's a lot to learn with an RV. So far, we've got hitching up, driving, and parking down (for the most part). I'd argue that's the toughest and definitely the most stressful part. Now we're prepping to use all the other hookups and use like the sinks and toilet for the first time. Here's what we've got so far! Kitchen 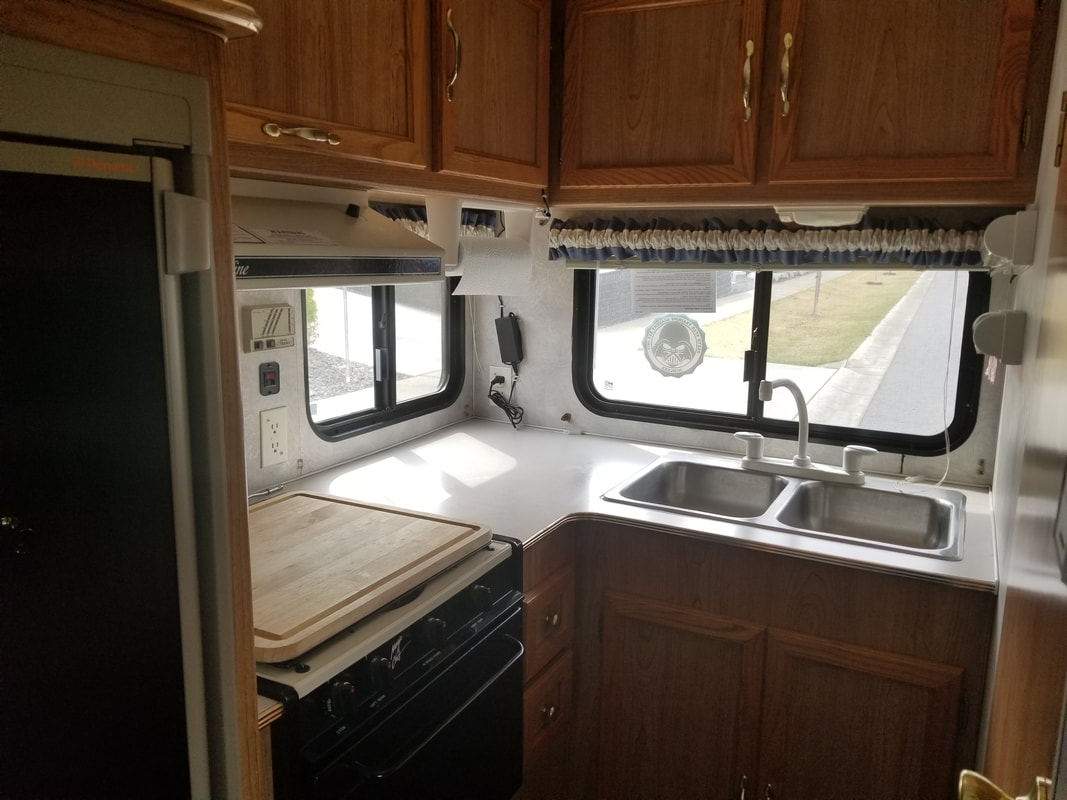 Day We Bought It
First off, we took down the awful ruffles and the bumper sticker. We don't plan on replacing the ruffles with curtains or another substitute. They don't put curtains in the kitchen since it could be a fire hazard. For simplicity, we're just going to leave the metal bars there empty. Next we removed the LED lights so we could get rid of that black electric box hanging in the kitchen. Then a deep clean and organizing all our designated kitchen dishes.
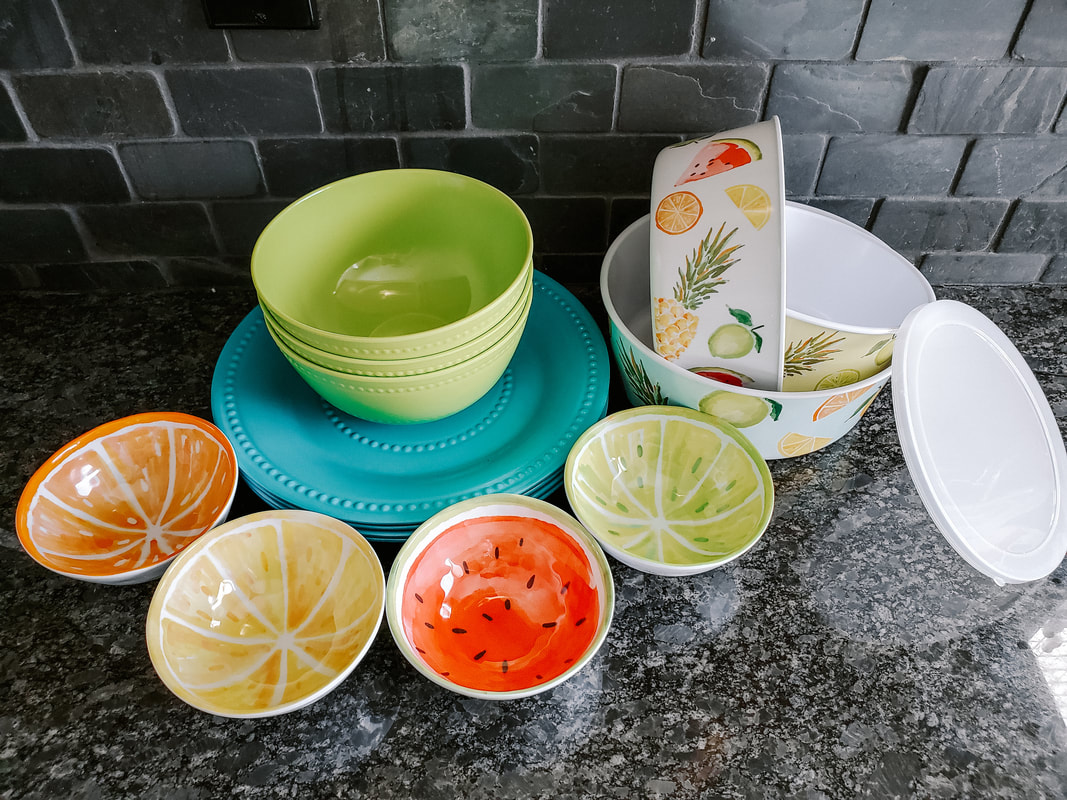
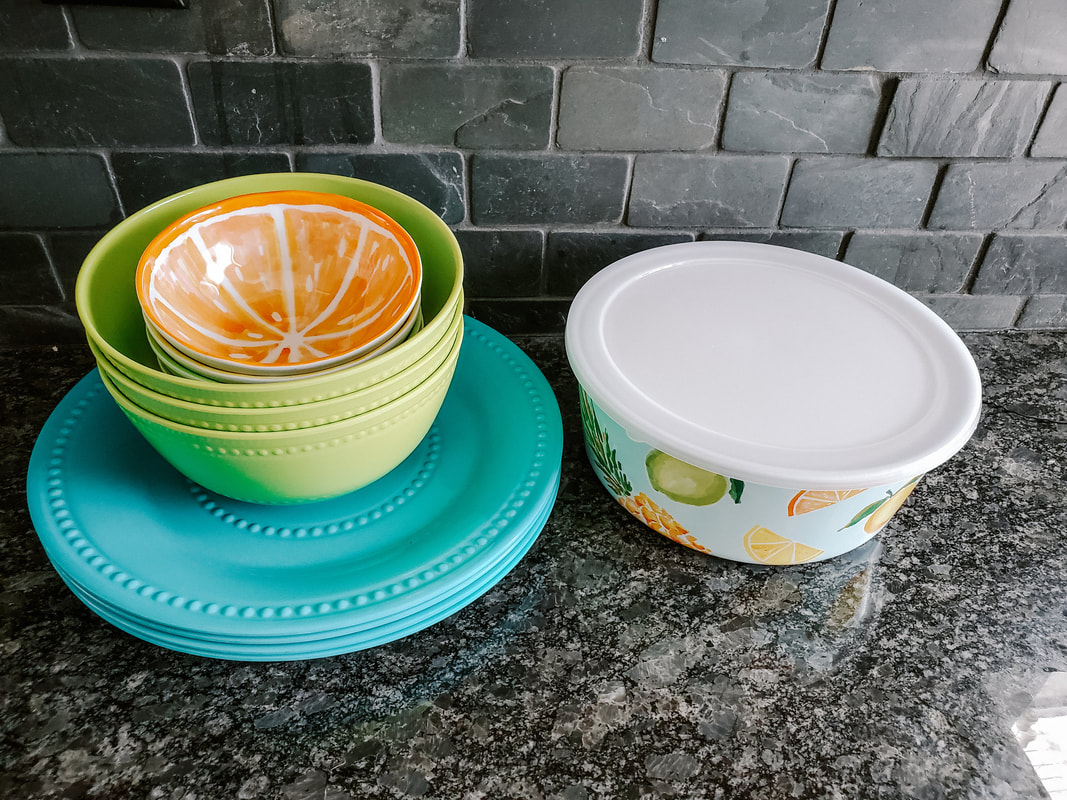
Here's part of the dishes we're bringing. These are designated only for the RV. These are all plastic dishes where we have all glass at home. Since we don't have a dishwasher and they're in a moving vehicle, most people only pack plastic in their RV. In addition to this, we packed a few metal pans (small enough for the oven), small size cutting board, and four of each utensil. We have three glass leftover containers we're bringing so we can safely put them in the microwave. These also stack together and to make sure they are protected, we just put napkins between each layer. For our extended trip, we'll pack all our usual essentials before we go (like cheese slicer, stirring spoons, pots, pans, etc.). When I was a kid, we always had dishes in the RV and they never left. We just took old stuff and added it to the RV instead of giving it away. Considering we're living in the RV for 2 months and all our stuff is going into storage, we aren't going to do that yet. It's really nice when you're prepping for a week long trip to have a set of kitchen stuff already there. We need to save space though so we'll be using our usual kitchen utensils (that aren't glass). We'll eventually stock the RV with only RV dishes but not until we're done with our long term trip. Dining Area
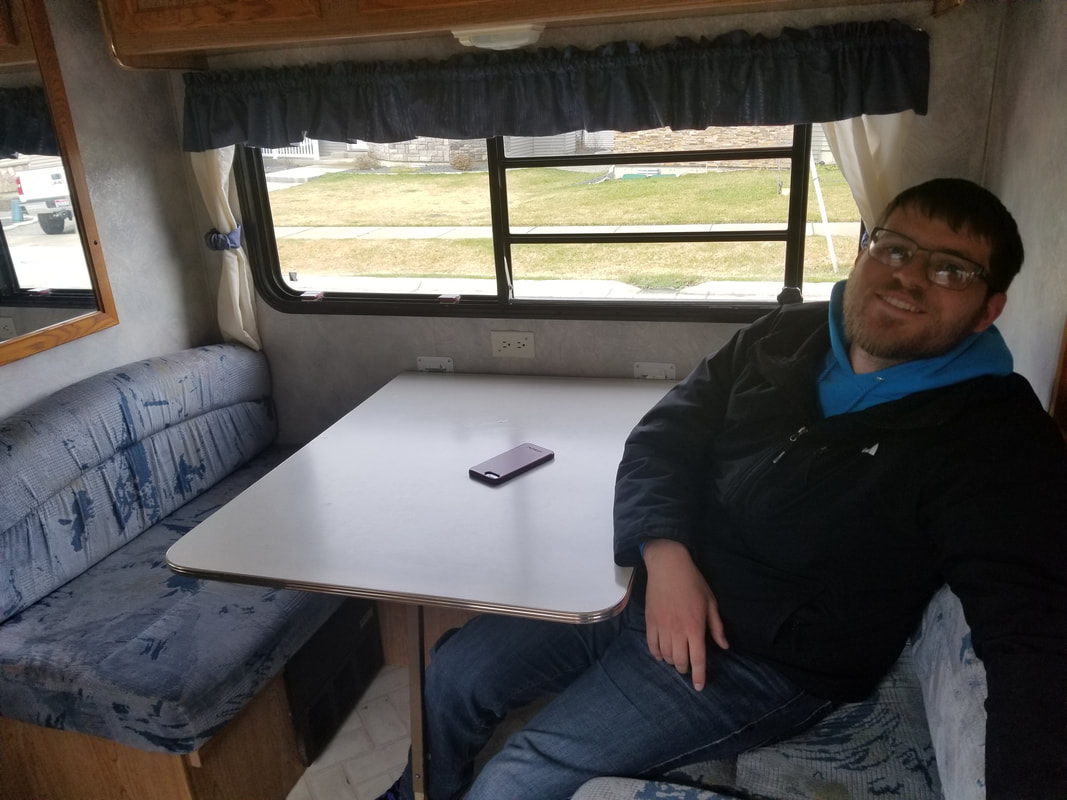
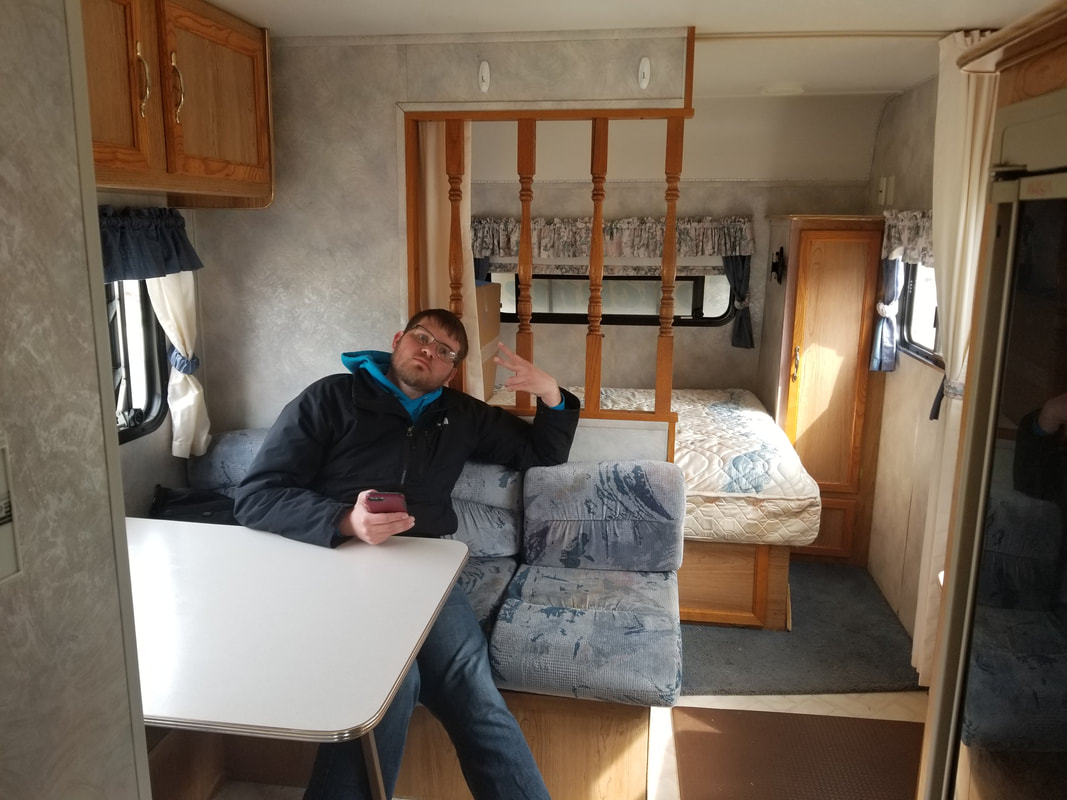
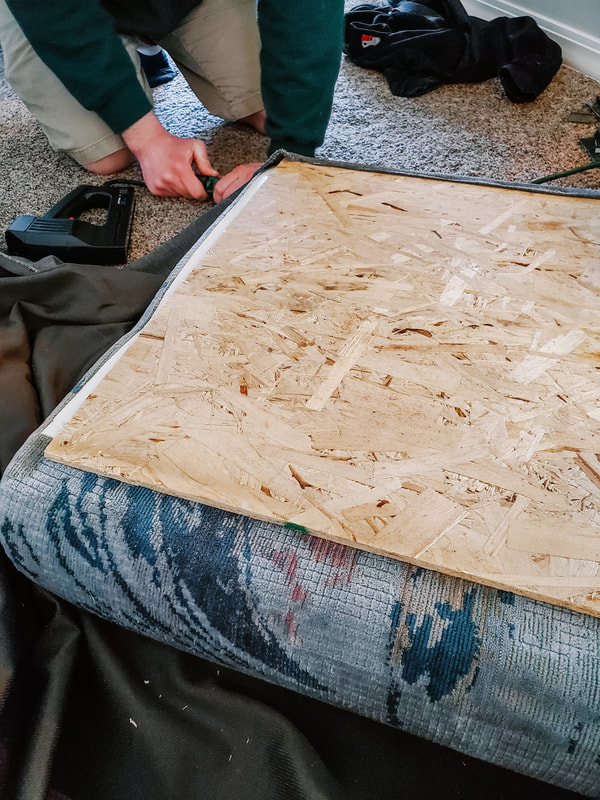
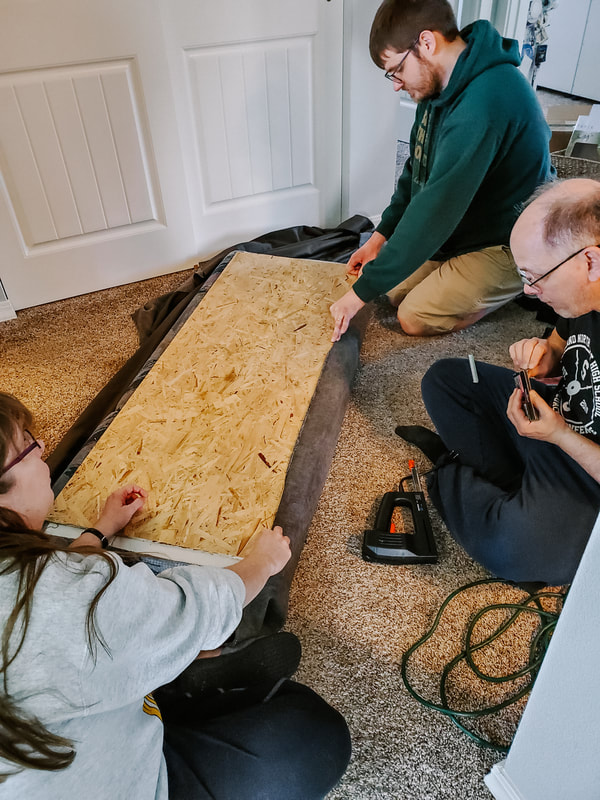
Our first step here was also taking down the curtains. They're so ugly and super easy to take down. We bought navy blue chevron fabric to replace the curtains later. Next was reupholstering the seats. The fabric really ages the RV. We bought some heavy duty fabric at Joann's. Unfortunately, we only had enough to do the bottom cushions. We're going to see if we can get more fabric later. It may end up being a different color since we bought it on sale last year. As for upholstery, we recommend you look up a YouTube video of someone who actually knows what they're doing. What we decided to do was add wood boards to the back of each cushion and staple the new fabric to that. Part of why we did this is so the old cushions can be restored by removing the staples. We did no damage to the original seats. The previous owners did a lot of weird modifications we had to redo and we want the next owners to be able to undo what we did.
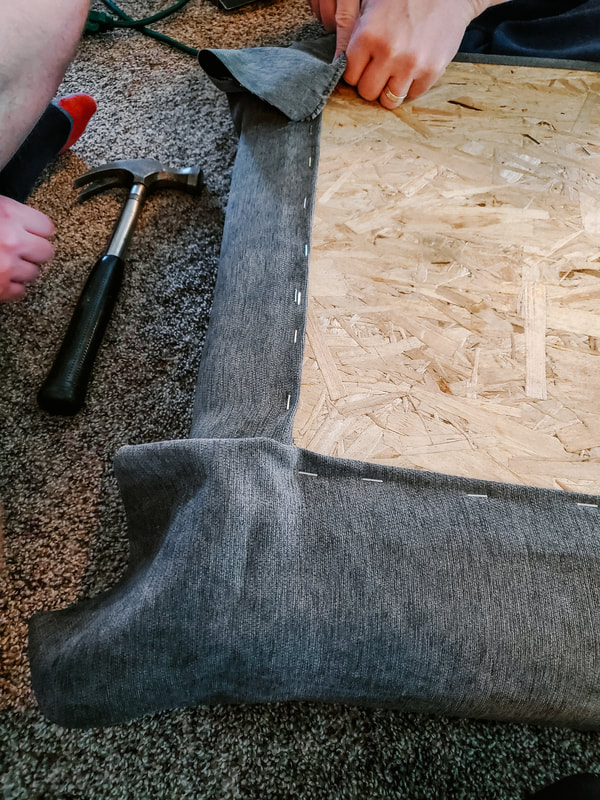
We bought a big piece of compacted wood that's around a quarter of an inch thick. It's thick enough for the staples but thin enough so the cushion fits. We ended up using the wood bases already there for the bottom cushions. One lead to the hot water tank so it was already removable. It's still able to be removed which is important for maintenance. The second side didn't lead to anything so it wasn't removable. We only had to take out 4 screws to remove that board. We trimmed down both boards a little bit to make sure the extra fabric wouldn't throw off the fit. By the end, we had two seat cushions that fit perfectly in the slot. For the actual upholstering part, we just used a staple gun and were careful to keep the board even until it was secure. We made the fabric taunt but made sure the fabric wouldn't tear when we sat down. Another modification was the extended seat. In lots of RVs, they have one side of the dinette longer than the other. Usually the extra cushion for this is just a small added section. We theorize that this is to save money on production. They produce all the same seat cushions and then only need the small part to add on later. Anyone who has had an RV with one has hated it. They fall off, fall over, and are incredibly inconvenient. We upholstered those two pieces on the long bench together so we didn't have to worry about it anymore.
Here's the final product of one bench! We ran out of fabric so we'll be be doing the back rests later. You can also see the close-up of the tacky old fabric behind it. 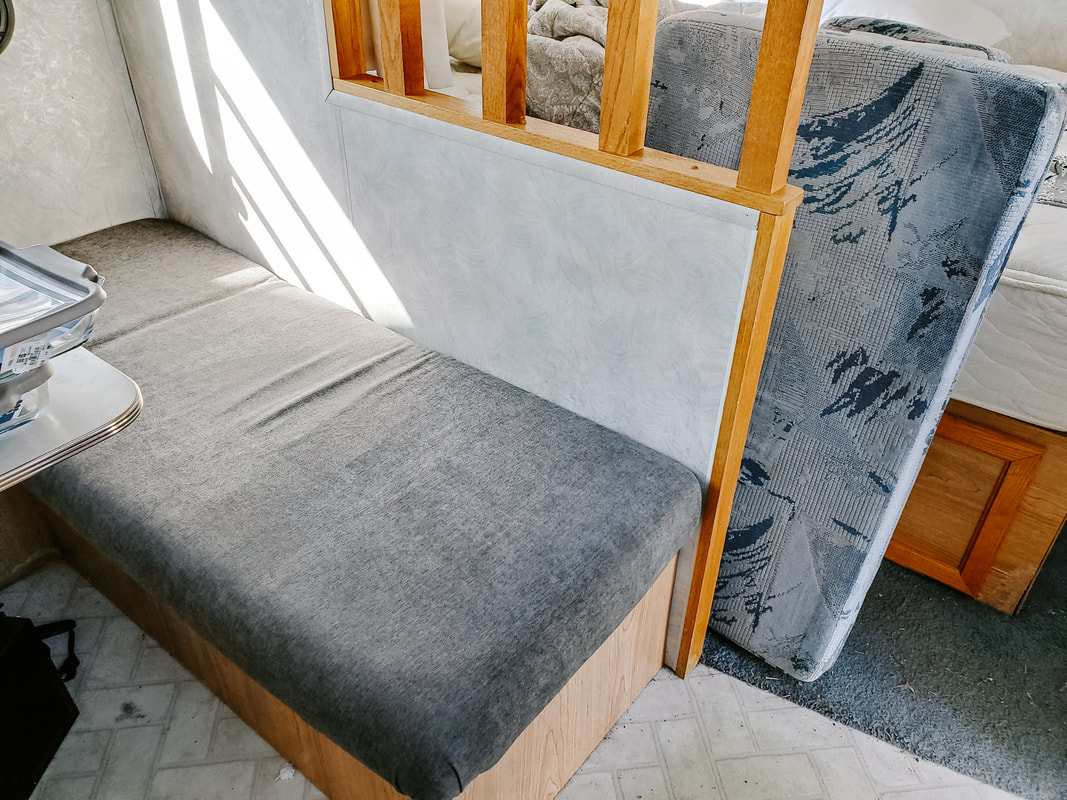 Final cushion (the one that we fit the two cushions together) Bedroom
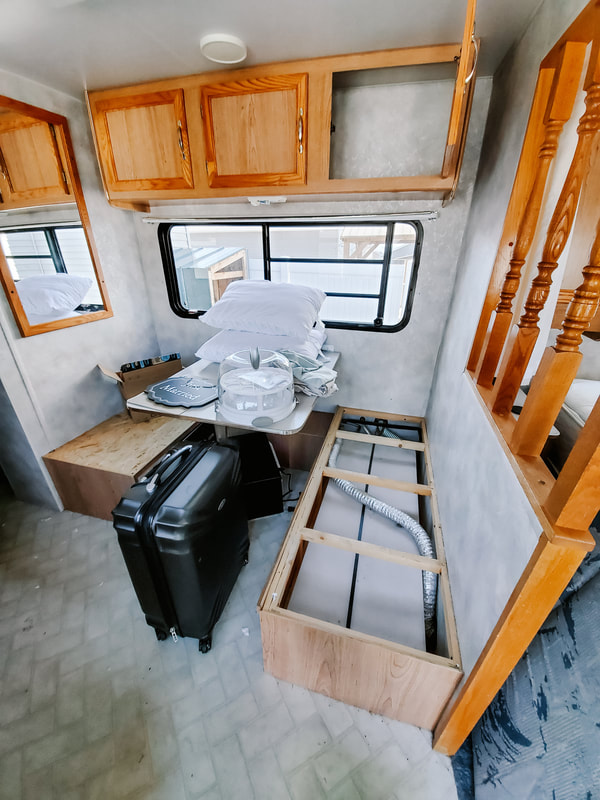
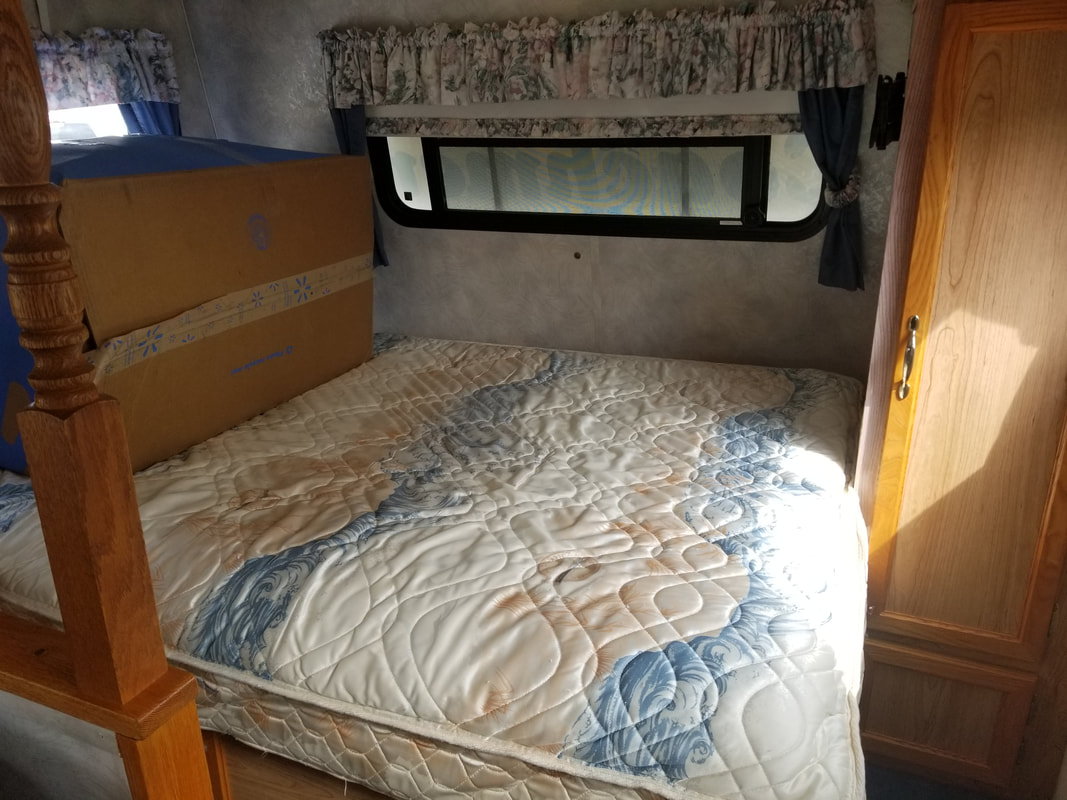
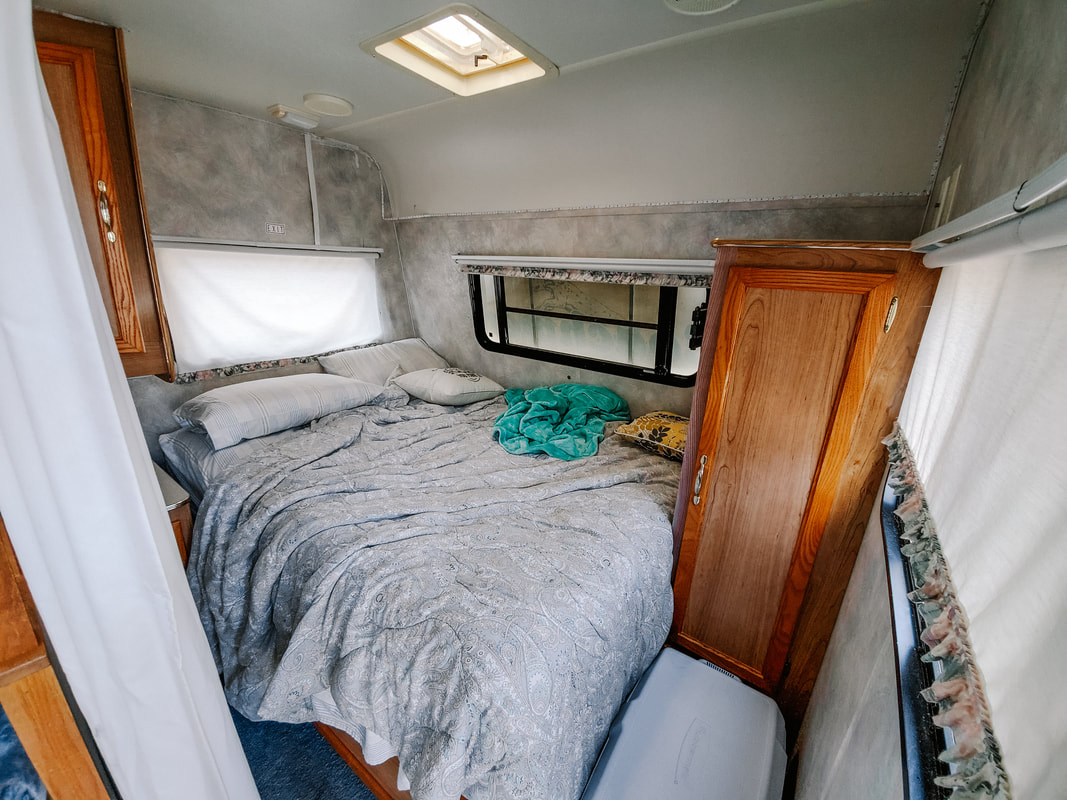
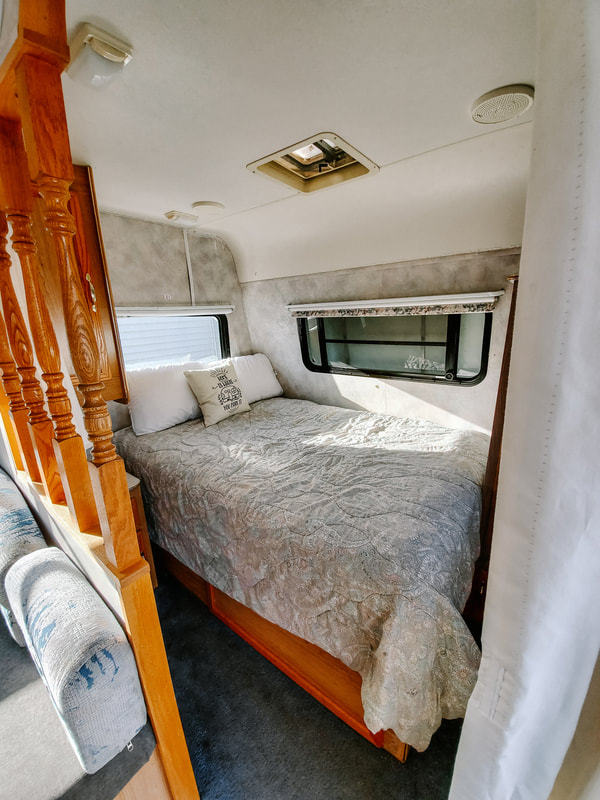
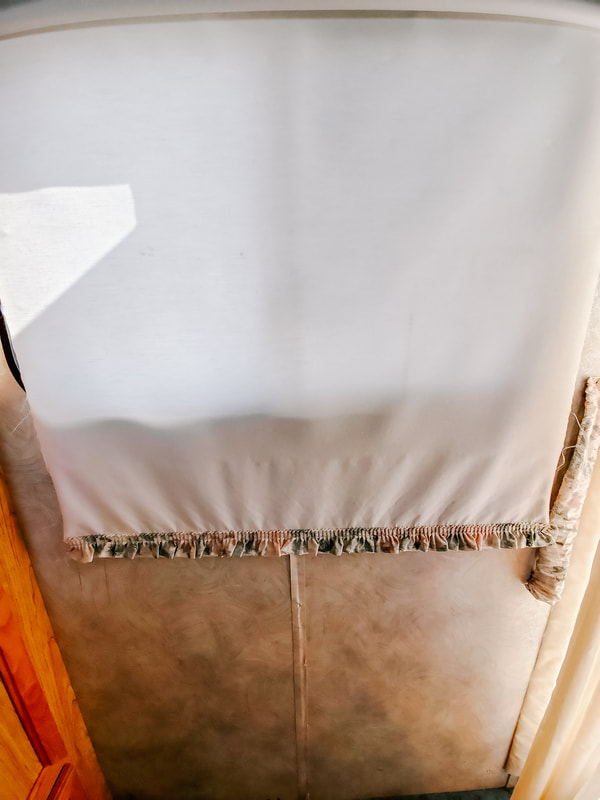
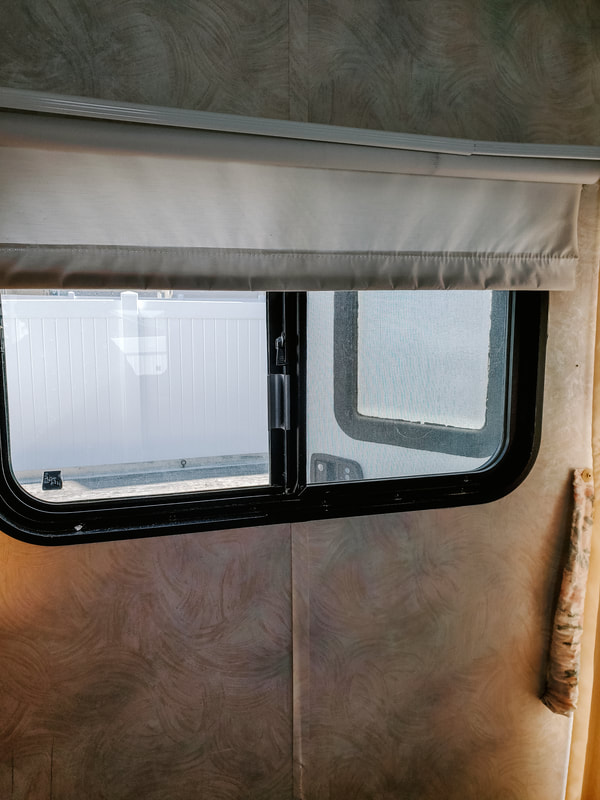
Again, first step was curtains. Next was replacing that horror mattress. It was literally blocks of foam jigsawed together in a mattress cover. Thankfully for us, we upgraded our mattress when we got married and took our old full size bed to replace the foam Frankenstein. Next was the ruffles sewed to the blinds themselves. No idea why you would ever do that but that's what we got. Not pictured is a TV mount that was drilled into the closet so you could watch TV from bed. We had to remove it for two reasons: the screws were going to tear clothes in the closet and the cabinet it was drilled into wasn't strong enough to hold a TV.
Bathroom
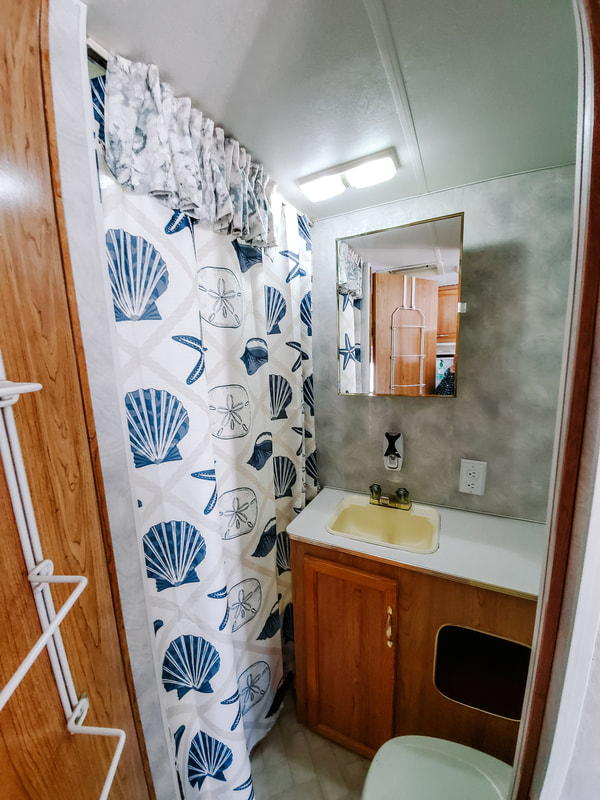
The bathroom was an easy one. It just had an extra fluff at the top attached with plastic clasps that had no purpose. The previous owners replaced the shower curtain with a cute one so we kept it. The sink is old looking but there's nothing we can do about it. Miscellaneous
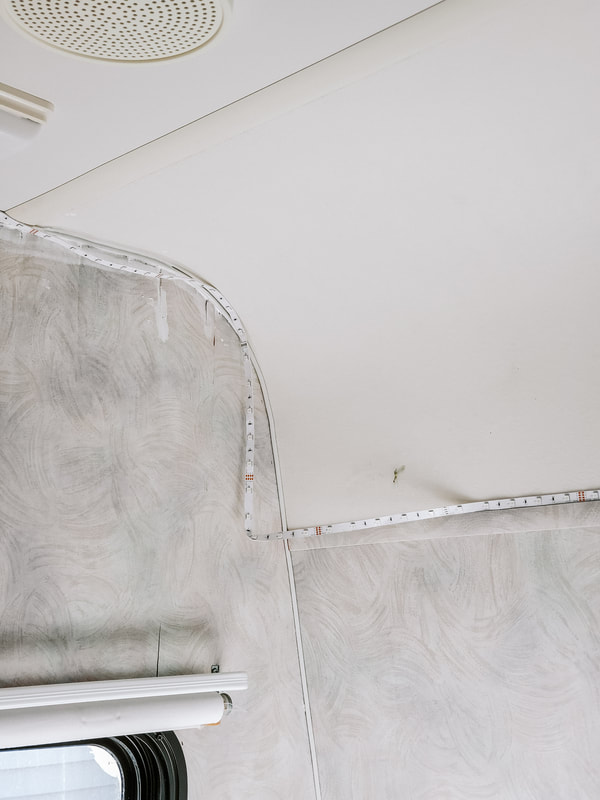
For whatever reason, the previous owners put around 35 feet of LED lights inside and outside the trailer. They're absolutely hideous. There were multiple electric boxes foam taped everywhere. We had to take down so much and some of it ripped the walls. I'd like to just take a moment and say...DON'T PUT UP LED LIGHTS IN AN RV. Also please don't drill stuff into the walls. RVs are cheaply and lightly made. You can't repair holes in the wall. We have so much damage from unnecessary features that could've been mounted in other ways. For example, one of our wall damages from screws is from a metal sign. Just lean it against the spot you want it. The whole point of this is to make sure you know that RVs aren't houses. You can't fill holes and paint over stuff. The cabinets are particle board with wood grain stickers on top. The walls are just a couple steps above cardboard. 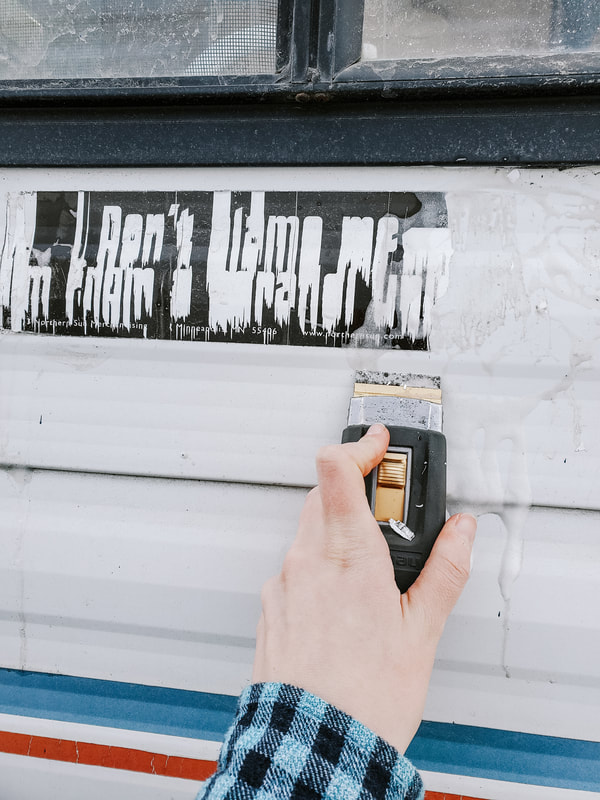 Next rant, don't put stickers on the siding of an RV. Windows are fine. There was an awful sticker on the window and it easily came off. Now this one has been a nightmare. Beyond taking me a couple hours, it's left permanent damage. There's little scrape marks from the blade (the only thing that will get it off). The foam is just window cleaner and I used it to make it an easier surface to work on. It prevents some of the scratches and makes the blade move smoother. Just as some general advice, make sure you don't add irreversible changes to large purchases such as cars and RVs. Just because you think it's cool, doesn't mean the next owner will. We bargained down because of the damage that would be left from the modifications the previous owners made. Don't lose money because you didn't take the time to find a way to make the modification in a way that's reversible. Also don't expect your modifications to increase the value of what you're selling. Some things do but many things won't give you a higher sale price at the end. On a positive note, look how cute these towels my grandma made are!  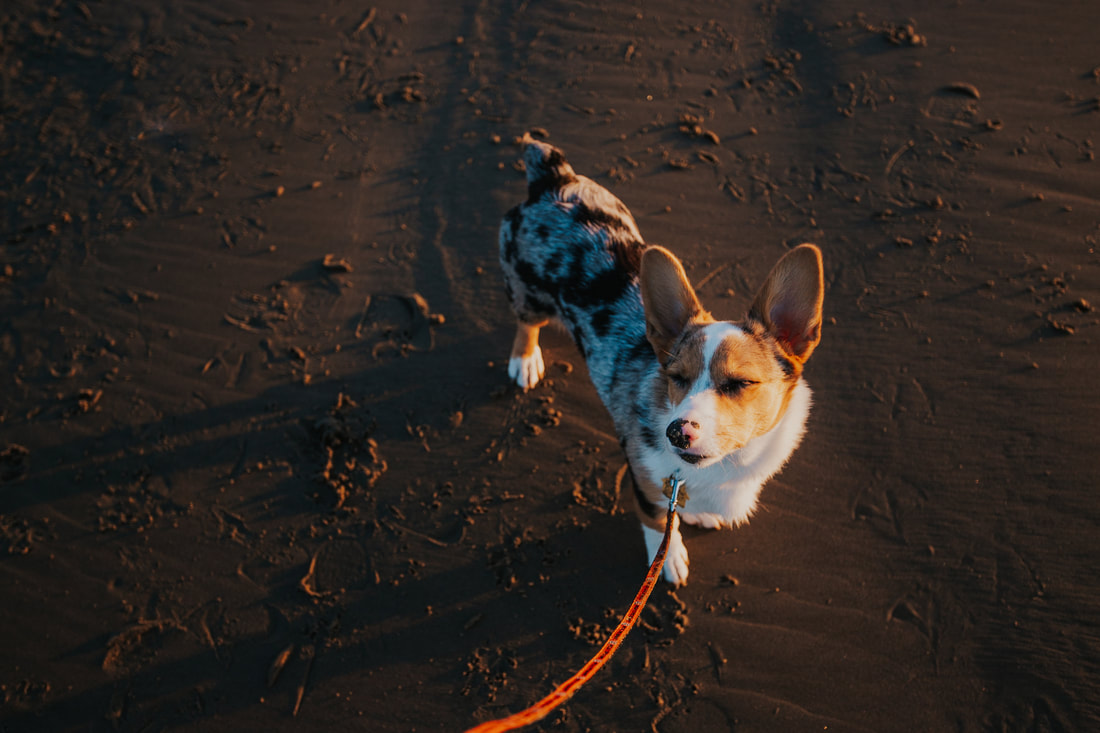 My husband and I have been looking for dog #2 for the last 4-6 months. We’re trying to adopt this time since we got Sophie from a breeder. As I’ve looked through adoption websites, it’s basically the same thing over and over. The same breeds with the same general characteristics. It’s really gotten on my nerves because it usually comes down to irresponsible owners getting dogs they shouldn’t have gotten. So I’m here to get on my soapbox and let you know some realities of dog ownership before you start on the journey yourself. Is a dog for you? Before you even consider what dog to get, you need to determine if a dog is for you. I obviously lie on the side of pro-dogs but everyone is suited for dog ownership. Having a dog is more than having a cute puppy to take photos of and having a friend that will cuddle next to you on the couch when you want it to.
 Now I want to go to the more positive side of dog ownership. I LOVE Sophie so much. She’s was one of the best decisions we’ve ever made. She brightens our lives so much. We bring her with us whenever possible because we want to spend all the time we can with her. She’s a loving companion, hilarious entertainment, and a stress relief after a long day. If you’re looking for a new member of your family, a dog is a great addition. But they truly are a member of your family. We make sure Sophie’s needs are cared for and that she’s happy. She repays us with her love and adorable personality. Make sure you’re truly going to give them a good life before you commit to a dog.  What kind of dog should you get? So you’ve done the work and you know you’re ready for a dog. Now you have to pick the right breed. For the love of all things good, don’t just pick a dog because they’re cute. Ya know my whining about shelters all having the same dog? It’s a bunch of people that picked a dog for cuteness not to fit their lifestyle. There’s exceptions to every breed but usually the breed characteristics are mostly accurate. Here’s the thoughts we went through when we picked Sophie:
I hope this information helps you pick a dog that’s right for you! Put in your work and do some research and you’ll have an amazing dog. There’s a dog with the right personality for everyone. If you take the time to find it, you won’t regret. You also need to make sure you’re truly ready for a dog. There’s many dogs that are at shelters because people didn’t do research on the breed, didn’t put in the money to fix their dog, or they didn’t plan ahead well enough. Let’s try to give dogs forever homes from the beginning.
Just about everyone with a DSLR camera has heard the horror stories of what cold, snow, or rain can do to a camera. If you haven’t heard them yet, let me be the first to tell you that bad weather can kill your camera. I’ve taken photos in poor weather conditions for years and I’ve created a very elaborate system to protect my camera. I’ve never actually ruined a lens or camera so my system may be overkill. For me, I don’t have to do very much math on the cost of my camera gear before I decide overkill is better than trying to replace my gear.
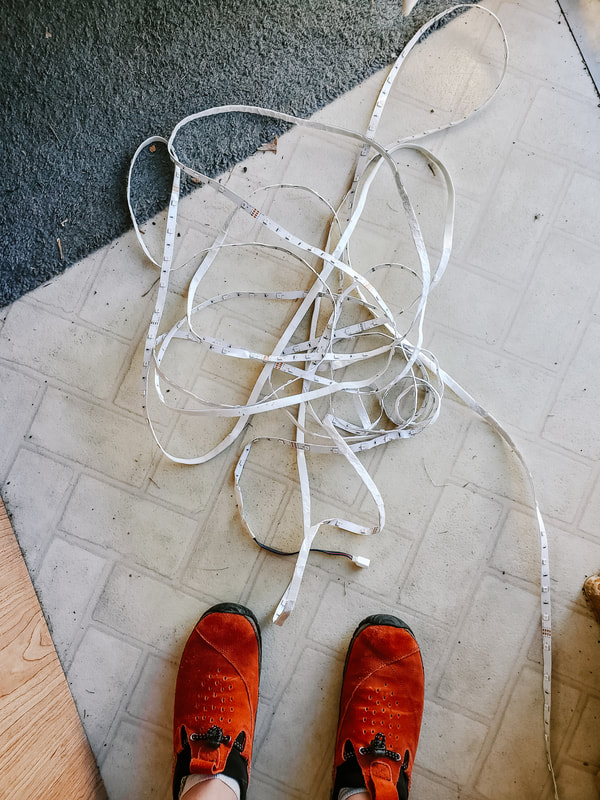
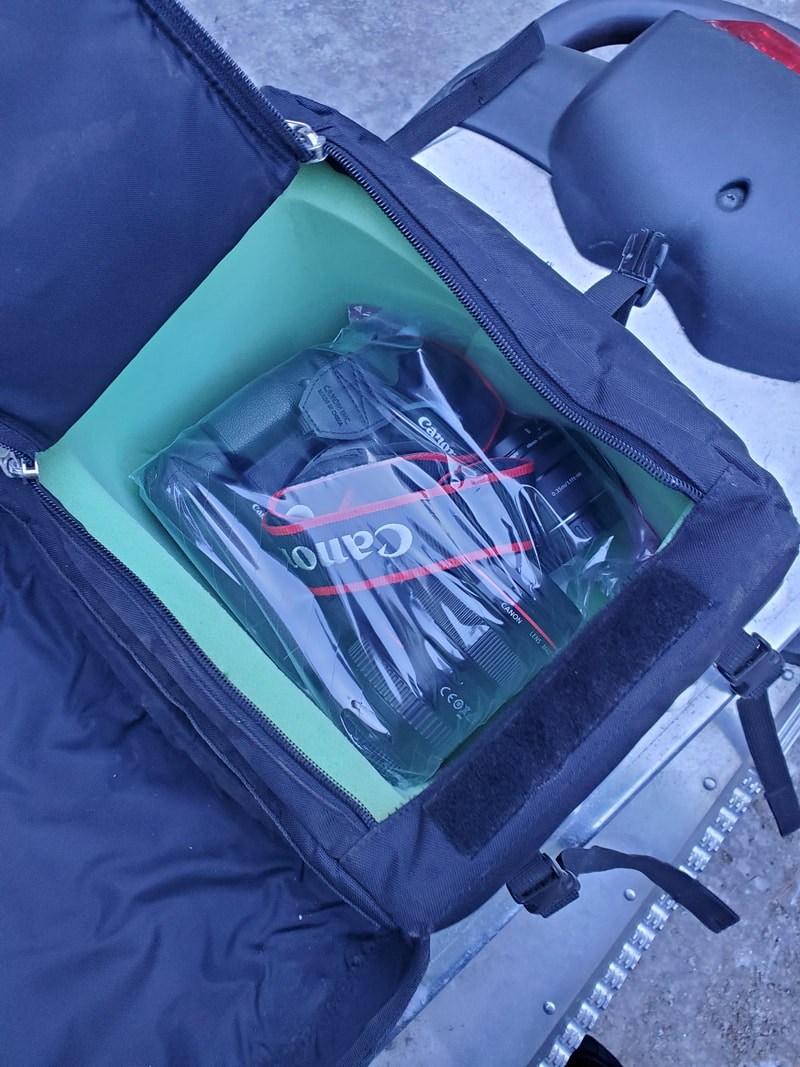
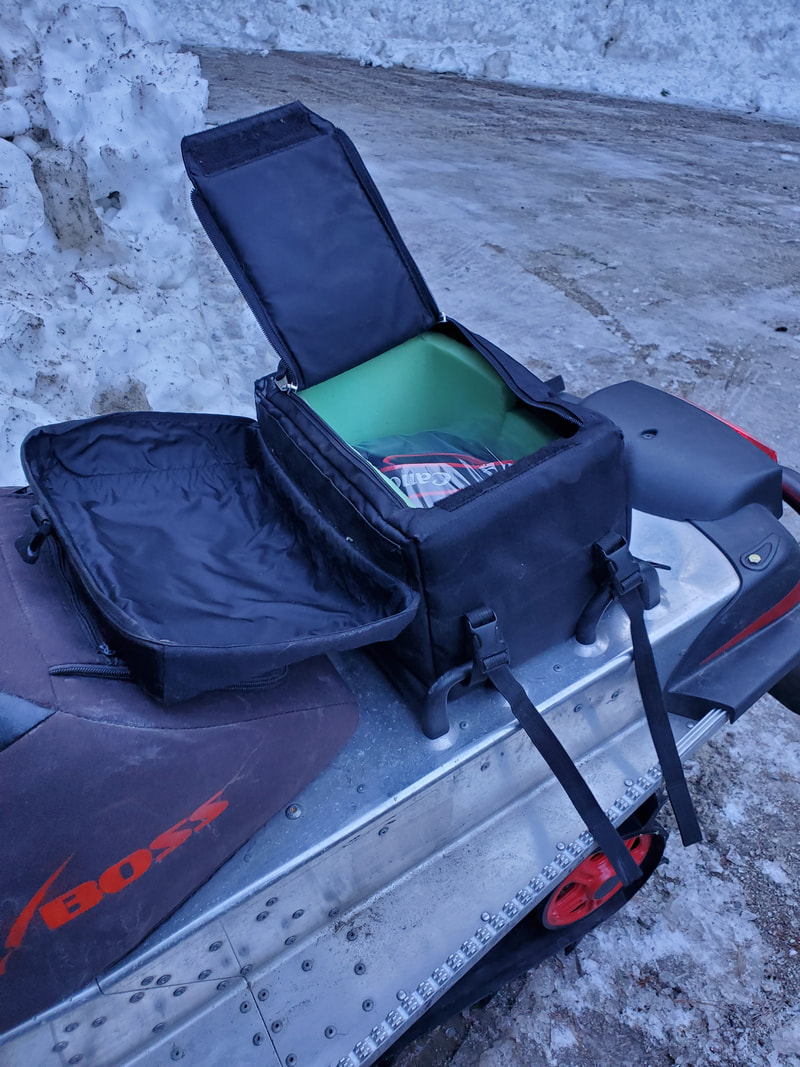
1. INSURE YOUR GEAR. If you’re consistently using your camera in inclement weather or even just adventuring with your camera, insure it. One of my lenses alone would cost $1500 to replace. And that’s if somehow I only broke the one lens and nothing else. It really doesn’t cost that much to insure it. I have a policy that specifically lists every piece of my gear with its value. Any gear less than $300, I decided not to list. I especially recommend you insure your gear if photography is some part of your career or livelihood. Like I said, it’s really not that expensive but your camera gear is SUPER expensive. 2. Don’t take it in bad weather unless you have to. For example, I brought my camera on most days during our New York trip. One day, I checked the weather and it was supposed to rain all day. I decided to leave my camera at home since I didn’t know how much we’d be outside or how well my camera bag (my purse) would protect it. Obviously if you’re taking pro photos of a wedding, you can’t just saw no when you see the weekly forecast. In this situation, the photos were for fun and they weren’t worth ruining my camera for. It ended up being a great choice because it poured rain and the weather was too bad for any good photos anyways. If the weather is bad, keep your camera safely tucked away unless it’s really important for you. 3. Get a good camera bag. Not all camera bags are created equal. Some will mostly protect your camera in normal bad weather but will fall short when it’s in really bad weather all day. I have a couple different levels of camera bags I use for bad weather. My first one is a normal camera bag with a tarp you can stretch over the bag. It tucks away when you don’t need it and bungees around the bag when it’s rainy. As a weird side note, I’ve also used this as an anti-theft method for those times where you’re waiting to drop off your big bags at an AirBNB or hotel. My second bag is mainly for kayaking. It’s 100% waterproof. I could dunk it in the lake and there wouldn’t be a drop of water in it. Usually waterproof bags have a top that has to be rolled down. It can be a pain if you’re getting your camera out a lot so I only use it when the weather is really bad. It also holds moisture in. You don’t want to put your wet camera in it because it will get anything else in the bag wet. I also never put a water bottle in the bag. Then I’m just opening up the opportunity to make camera soup. 4. Use a turkey oven bag. I’ve used this method lots and I usually have a turkey bag folded up in my camera bag just in case. I use one of the corners and cut a circle the size of the lens. Then my entire camera is covered except for the end of the lens. This is definitely not convenient but if you absolutely have to take photos with no cover, it’s a good alternative. 5. Protect it from the cold. This is my inclement weather area of expertise. I’ve been snowmobiling for years and I’ve created an elaborate method to protect it. Cold can cause condensation to form in your camera that may not dry out. Here’s my steps:
When my husband and I were planning our wedding, we started with a pretty normal wedding format. We joked many times that we should just elope on the beach because planning was so stressful. 4 months before our wedding, we weren't joking about it anymore. We changed our wedding plans so far into our reception and started planning our Oregon Coast elopement. This is our travel blog but we want to include this here because we think there's a lot of people like us looking at travel pages like this. Eloping was a perfect decision of us and we hope to show people how awesome this option can be. Since we've eloped, I've basically become a spokesperson for elopements because I love them soooo much. So here's why we eloped so you can see if it's right for you too. Enjoy my rant because I can really get rolling with this. 1. Eloping is about you. You don't have to wedding plan very long before you figure out how much of the wedding is about what you're "supposed to do" and not what you want to do. You'll be amazed at how many opinions come out when you're planning. If you don't do this, you're sending this message (and it's usually negative). You start to feel all this pressure for people to view your wedding the "right" way and you lose track of what you actually want. 2. It focuses on your relationship. We had two parts to our wedding so we had the unique opportunity to see both sides of weddings. At our elopement ceremony, we spent so much quality time together. We even had a 20-30 minute window where it was just the two of us hanging out on the beach. I actually got to see my new husband and enjoy this new milestone with him. At our reception which was more like a traditional wedding, I hardly saw him. We were so busy getting all the wedding stuff done, trying to keep on schedule, and visiting with out of town guests that we had no quality time together that day. Thankfully, we were fine with it considering the amazing elopement we had already had. 3. You get to focus your family and friend time with the people that matter. We had 20 people total at our elopement including us, the photographer, and the pastor. We brought our immediate family and wedding party. We only had the most important people in our lives there. I had so many amazing moments with my loved ones and my new in-laws. I felt like I really got to celebrate and enjoy my time with them. In contrast, I hardly saw them at the reception. You have so many people you rarely see and you want to spend a bit of time with all of them. It was nice to just focus on those people at our reception knowing that we'd already had so many valuable moments with our loved ones. 4. It's so much more private. No offense to anyone, but as a private person, it's hard to wear my heart on my sleeve for my vows when that one person I met once 10 years ago that we had to invite to not offend someone is there watching. Super cool they're watching this super intimate milestone and I'm not even comfortable having a conversation beyond small talk with them. 5. WEDDINGS ARE SO EXPENSIVE. Isn't it fun when an important, meaningful event in someone's life is turned into a cash cow? At least double the price of anything when you turn it into something wedding related. We ended up spending more than we hoped because we already had half of a normal wedding planned (turned reception). We also did a lot to save money when planning everything. Oregon beaches are public land and under 50 people doesn't require a permit (check their site before taking my word though). We stood on a secluded beach with an aisle made of lawn chairs. Our reception was at the fairgrounds which is usually a super cheap bet. Ya know what we did with the money we saved? We went to Europe for 3 weeks. Do something you enjoy and make some epic memories with your new spouse. You aren't going to remember if you had custom napkins or succulent favors (and I love succulents so much). 6. You get to go somewhere cool. Even if it's a local spot, eloping opens up so many doors for venue. You're not trying to keep great Aunt Edith from falling in a creek and listening to her whine about bug bites for 4 hours. You can pick a spot that's meaningful for you and even make an adventure out of it. We'd both been to the Oregon Coast multiple times. We loooove it there. We've had lots of great memories there. The location was mainly for me. I've been passionate about the ocean since I was 4. My soul comes alive when I hear those waves crash. I got to frolick on the beach and look for ocean critters on my wedding day. I get choked up just thinking about how perfect that day was. Pick a spot that makes you feel like that. It seriously adds so much meaning to your day. 7. You can make a trip out of it. Not only was my wedding the best day of my life, but the whole weekend was the best weekend of my life. My grandparents are in their 80s so they recently stopped traveling with us. It was so much fun to go on vacation with them for what will probably be the last time. I also got to road trip over with my bridesmaids. Imagine all of your best friends going on a weekend vacation to the beach. HECK. YES. I even had my bachelorette party in Portland which was awesome. 8. No stress. I can honestly say that I experienced almost no stress on my wedding day. It took a little extra time to get ready but our photos also went faster than expected. We started our wedding ceremony 15 minutes ahead of schedule and just went with the flow. We had a beach house rented so we all just hung out together. There was no rush or harsh itinerary. We had a regular ol' dinner all together with our newly joined family. The waves crashed outside. We even have cute photos of my husband's grandparents watching the waves from the window together. So many sweet moments that would've been missed if we had a rigid schedule. 9. You get to totally customize your day. I wore hiking boots. My bridesmaids and our entire family went barefoot. I changed out of my dress for dinner so I could enjoy eating without feeling suffocated. We did our own hair and didn't care when the wind on the beach messed it up. We went hiking after the wedding and got some epic photos (and epic memories). Your day is about you and your partner. Don't let anyone tell you otherwise. In case this already doesn't sound amazing, here's some photos of our special day. Shoutout to Karlie Larson Photography (best friend and bridesmaid extraordinaire) for capturing our elopement. I also highly recommend you have a professional photographer best friend take your wedding photos. It makes the poses come a lot more naturally. Our Elopement My Elopement Photography As you can tell, I'm quite passionate about getting people to elope. I think there's so many people who are missing out on their perfect wedding day because of the stigma attached to eloping. Eloping has changed. Even if your relatives are being a bit snotty about it, remember the whole point is to focus on you. I'm going to sneak in here to advertise myself a bit. I've been doing photography for 10 years now and professionally for 6 years. Below, I have some elopement photos I've taken. If this eloping thing sounds like it's for you, check out my work and my rates on my website. I'd love to help you create the wedding of your dreams so you can love your day as much as I love mine. I also think it's garbage that the wedding industry has turned into this cash cow trying to make money off of an important milestone. I keep my prices low specifically to combat the wedding industry trying to make weddings about money and not love. My time and skill are being fairly compensated but I'm also not going to take advantage of my clients. If you like my work and you're looking at eloping, check out my professional photography website for rates and information!
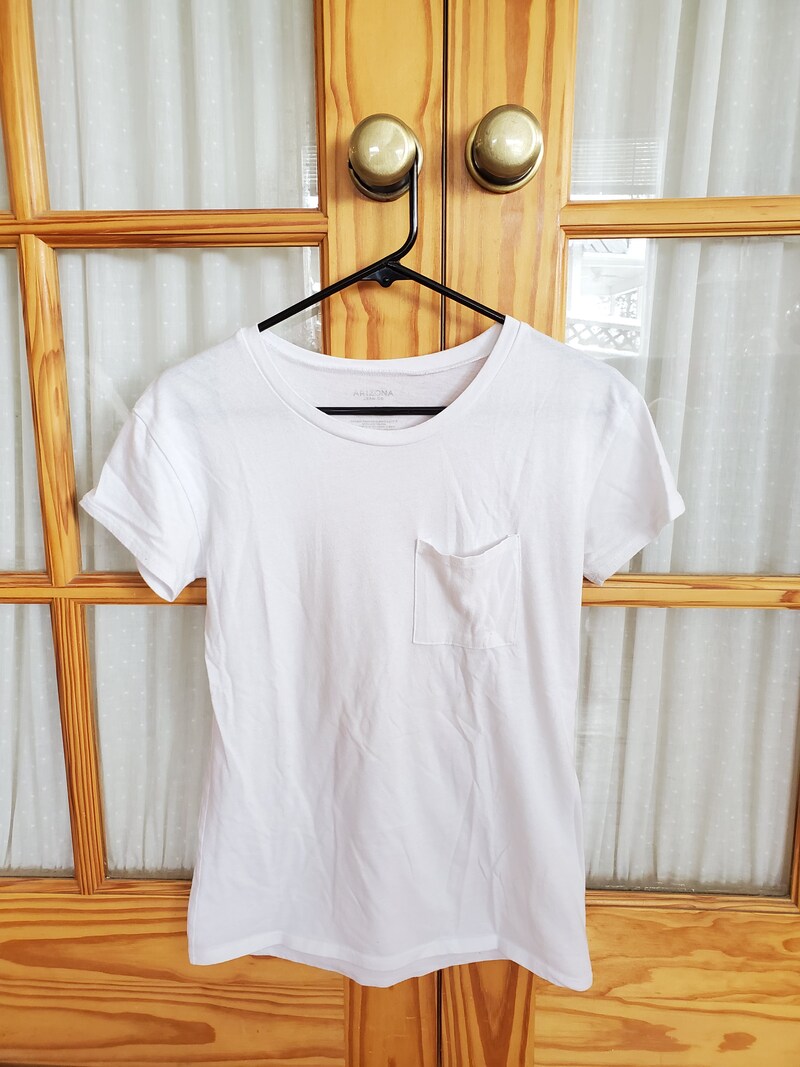
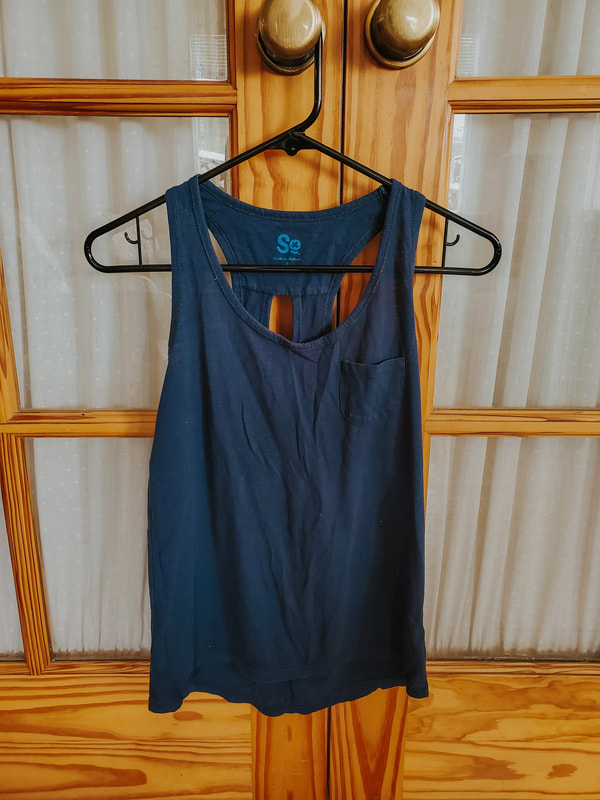
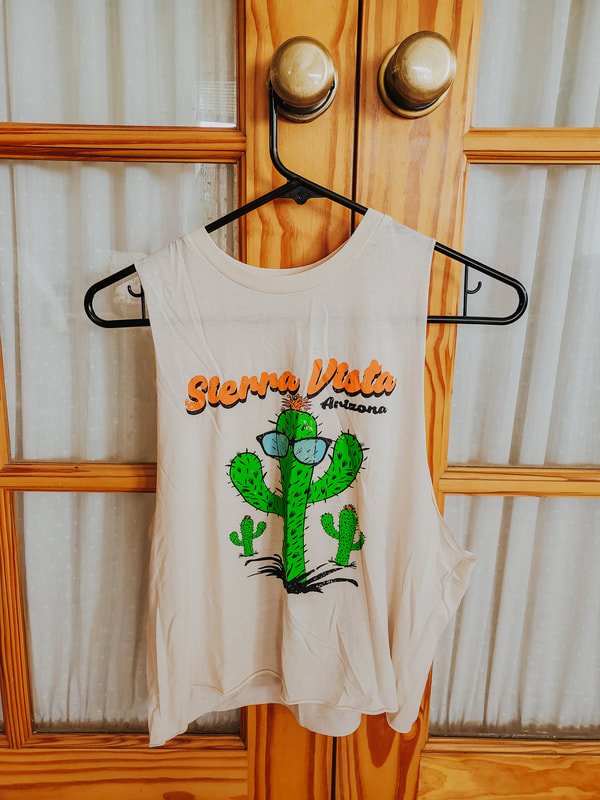
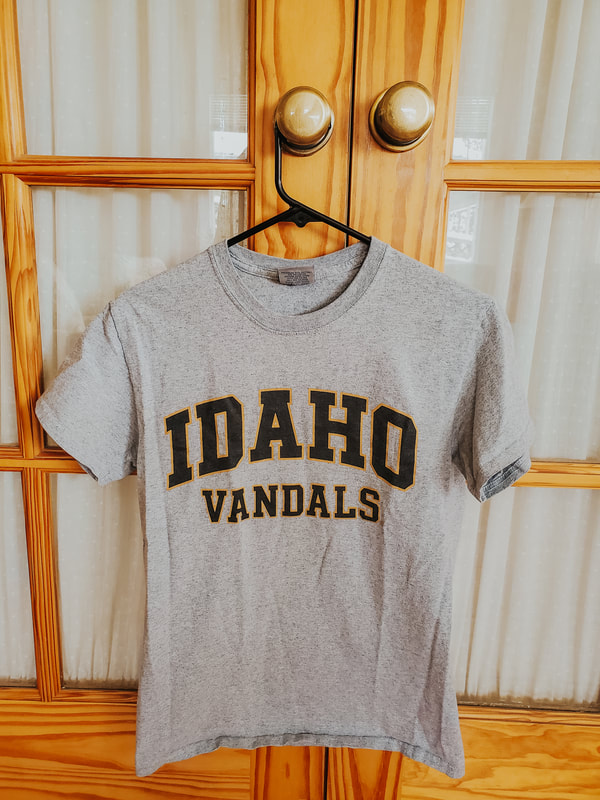
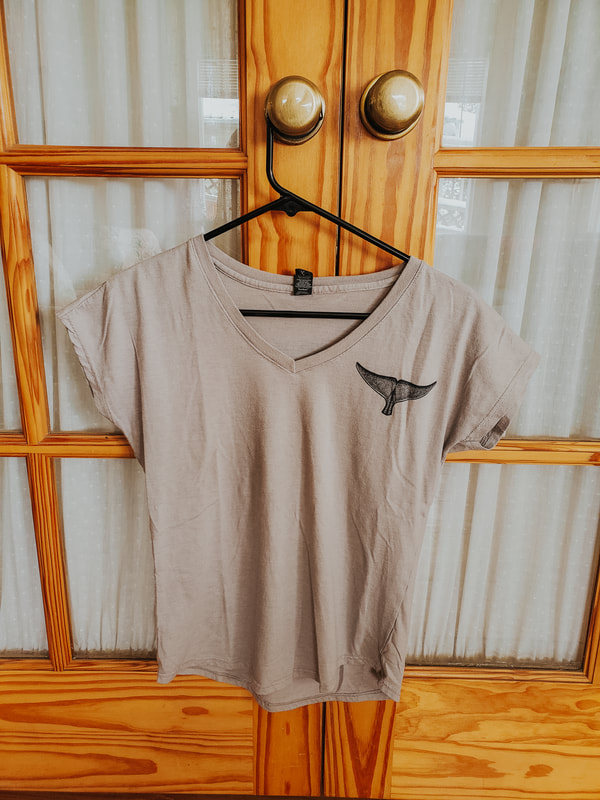
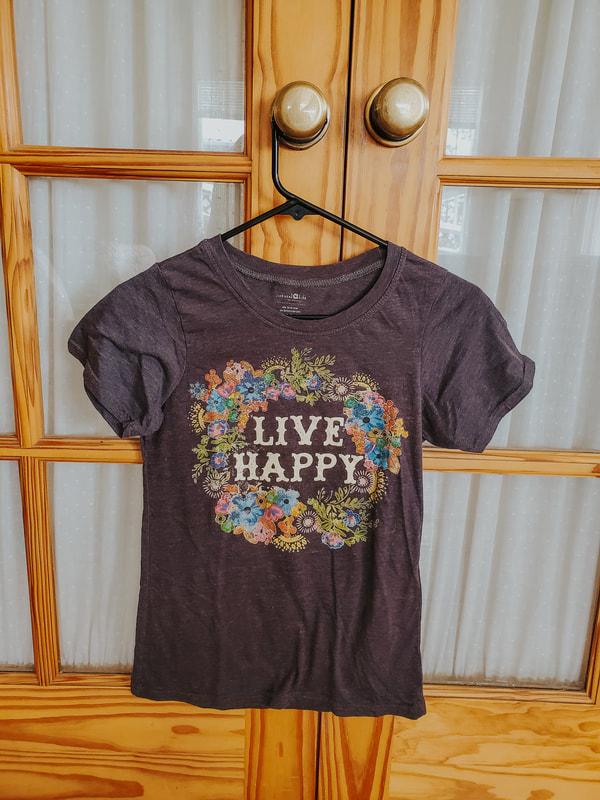
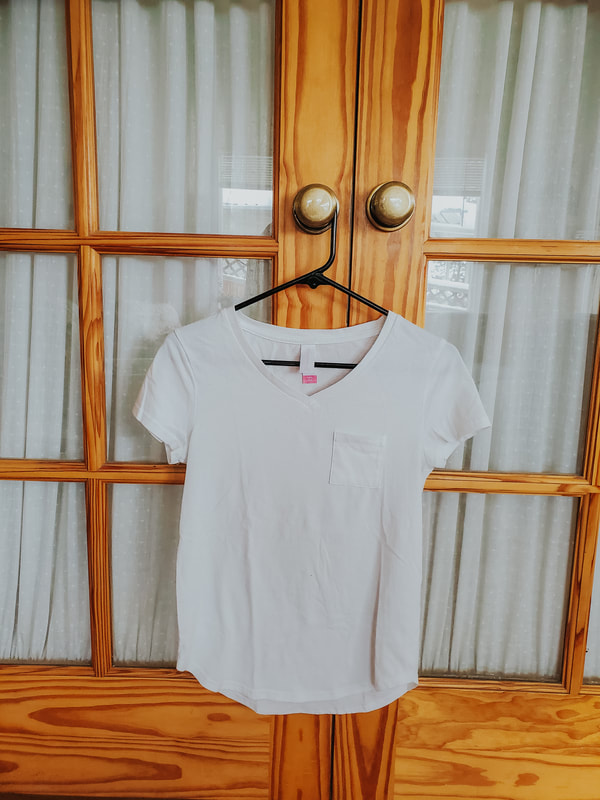
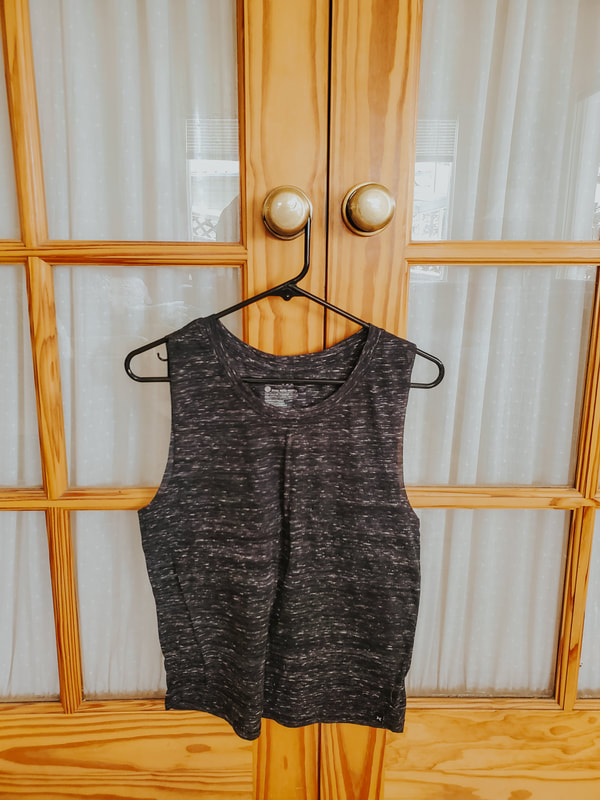
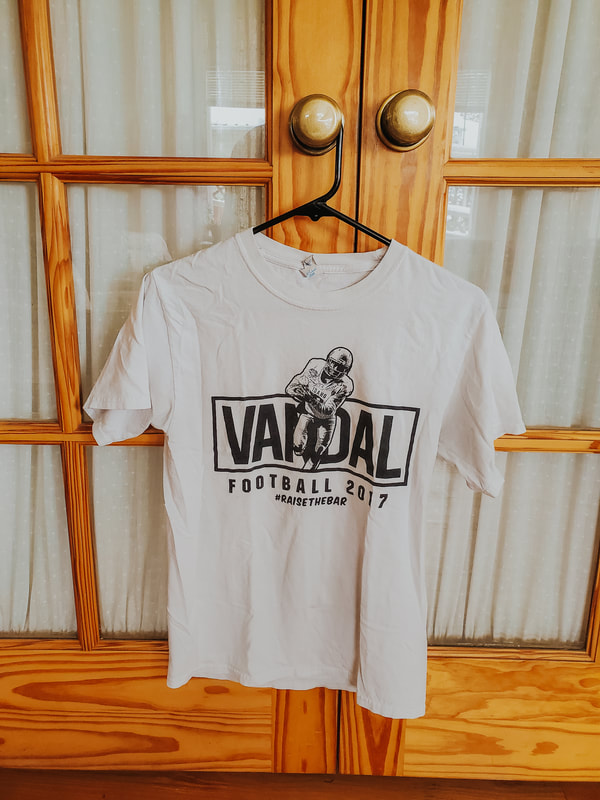
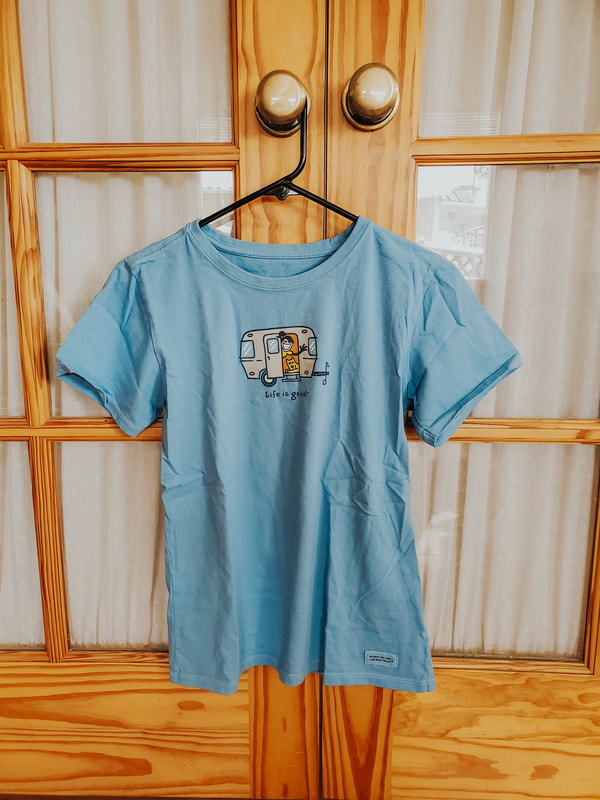
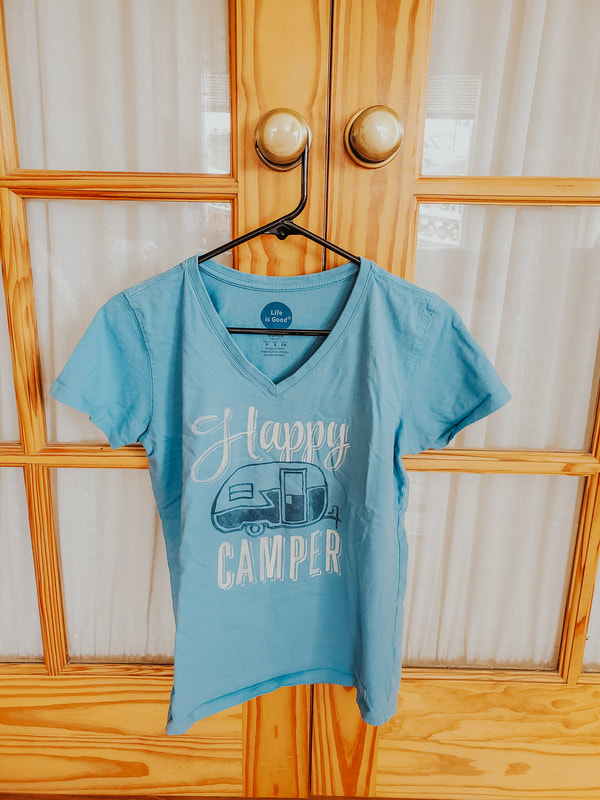
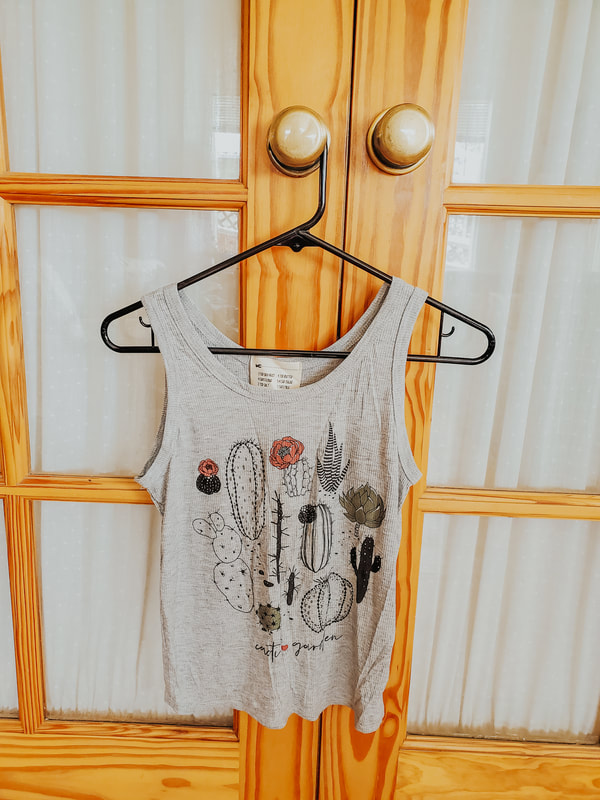
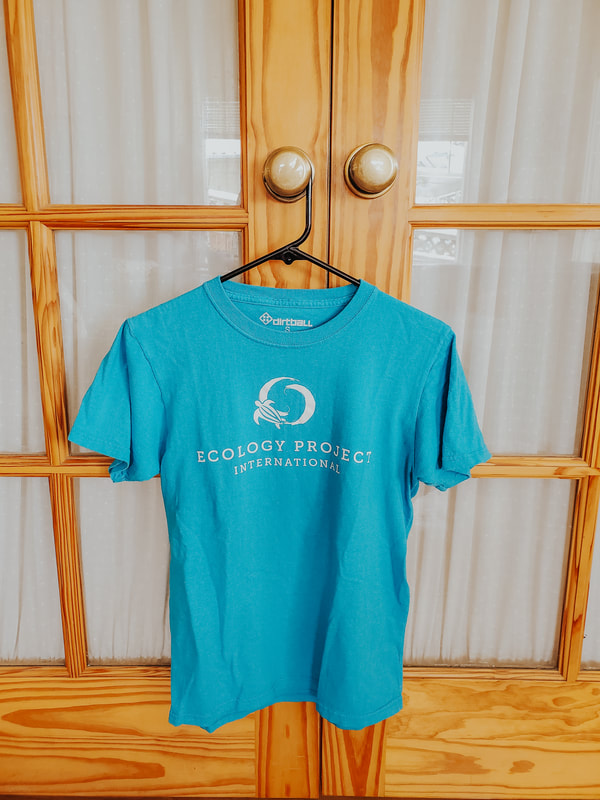
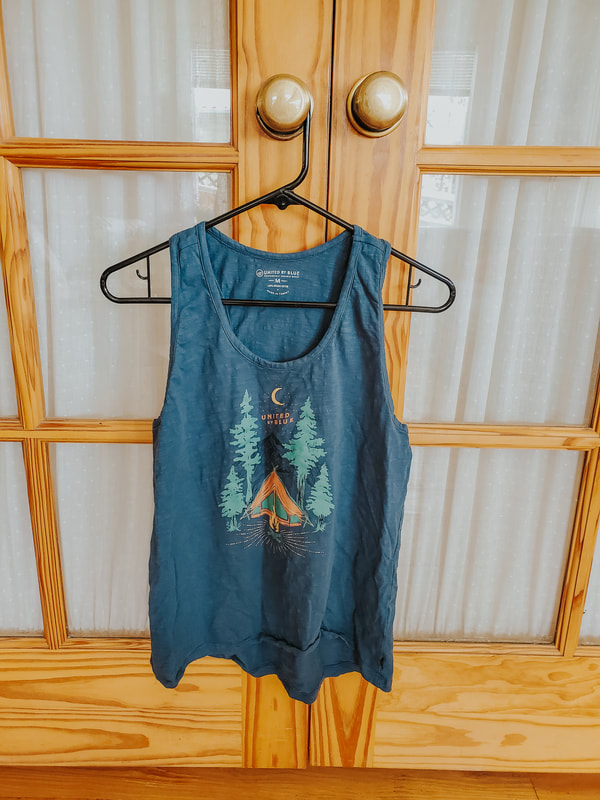
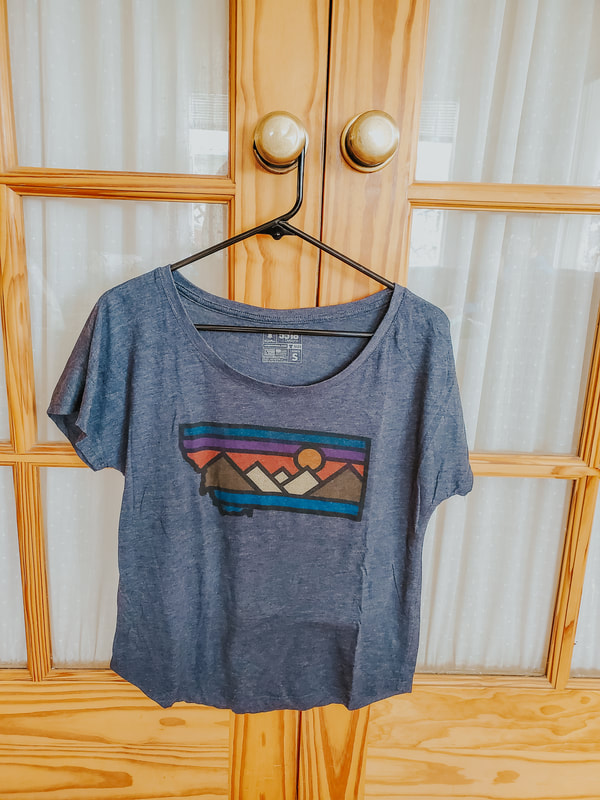
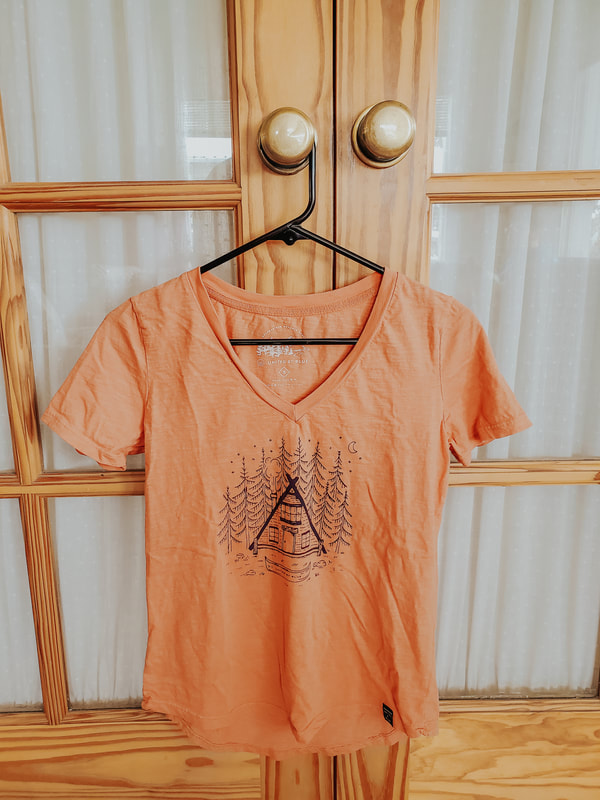
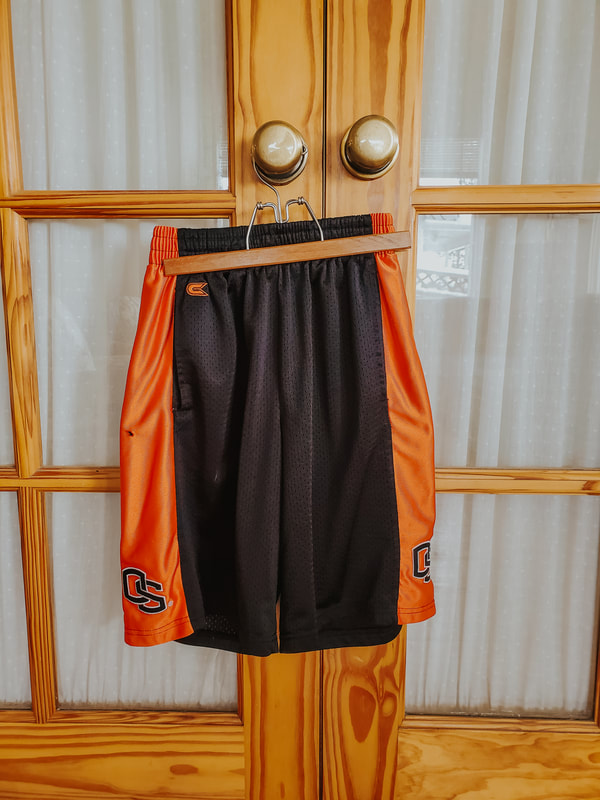
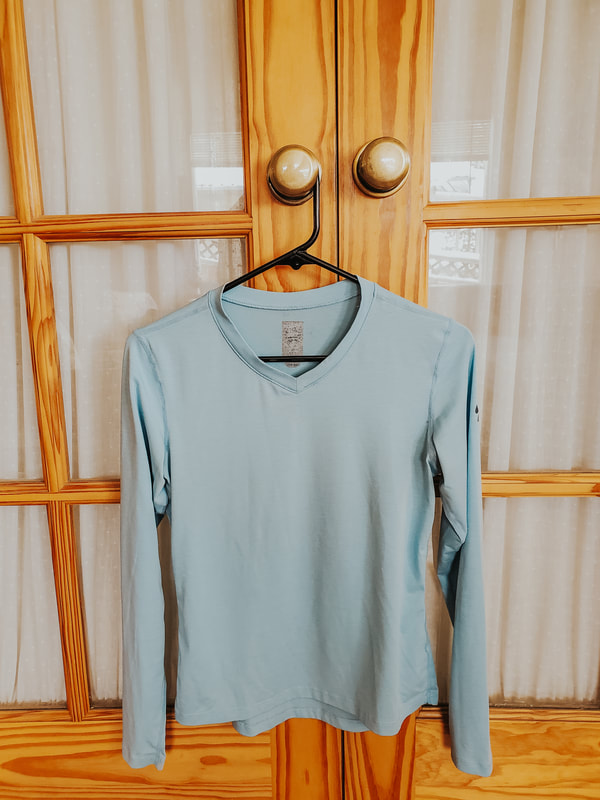
As we've shared a few times, we're hitting the road for two months this summer! We got lucky with our current rent arrangement and with comparable living expenses, we can road trip the West Coast in our RV for 2 months. We also are both teachers so we get 3 months off and still get our paychecks. This convenient combination is making for an epic summer. This also means that I have to pack for 2 months in an RV closet. For those of you who haven't seen an RV closet, it's not much. No drawers, just around 12 hanger slots (so all your clothes don't drop when driving) and a small cabinet below (not even a drawer). I also have to plan for a wide variety of weather. We'll be spending a while on the coast where it can easily get to 50 degrees in the summer with wind and rain. Then there's Southern Utah and last time I was there in June, it was 115 degrees. As you can tell, it's taking some very careful planning and organizing to make it all fit. Obviously we're going to do laundry on the road. We also are going to be in the middle of nowhere without access to laundry a lot. So I have to balance having enough clothes to last me a while hiking in the dirt and chasing my dog on the beach. I'll post how I got this all organized in my closet once the trailer is loaded. As of right now, all my clothes can fit in a medium sized box. Here's how I strategically planned my road trip wardrobe: Shirts and Tank Tops For shirts, I'm going for a wide variety. There's thicker, standard shirts and thinner shirts. Most of them also correspond with other layers I packed. So a tank top for the desert could turn into a base layer on a cold day. I also went for more neutral colors. I can wear it with more of my other clothing items so I have some more variety. They're also small so I can pack more of these without taking up too much space. I'll be adding two more shirts from 208 Tees as well and I'm pumped about them.
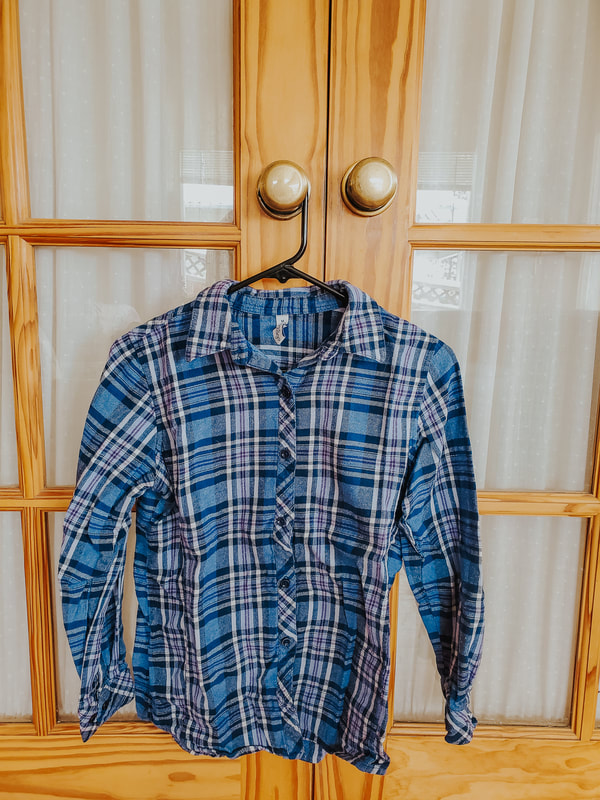
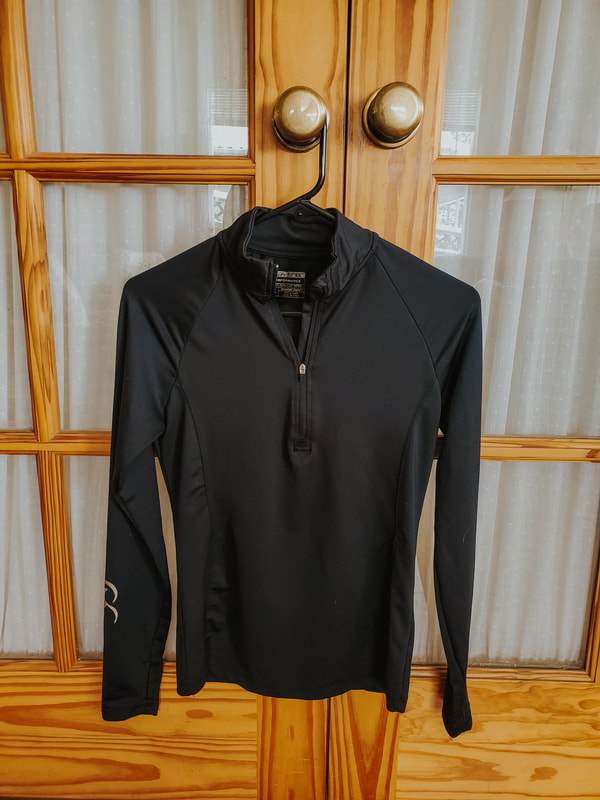
Second Layers I picked these second layers specifically for throwing on during a cold morning or evening. They're light enough to easily carry around and only for when things are a little chilly.
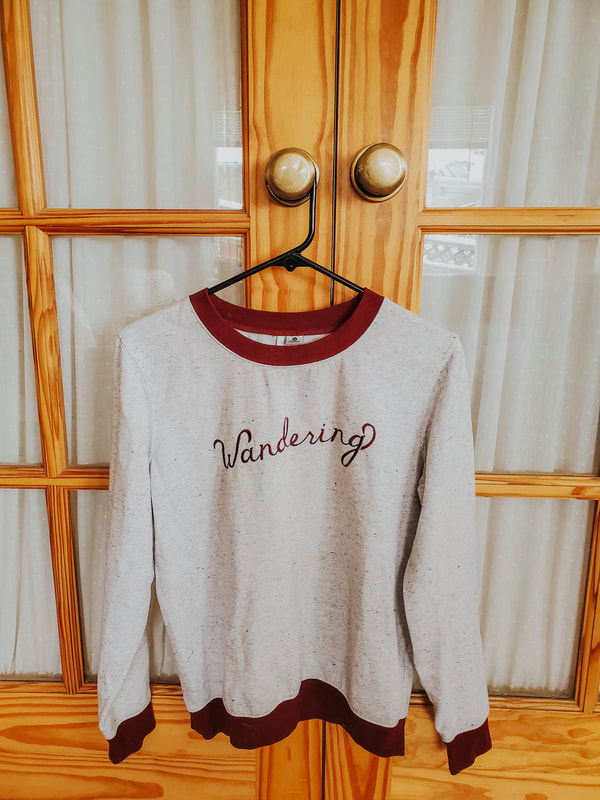
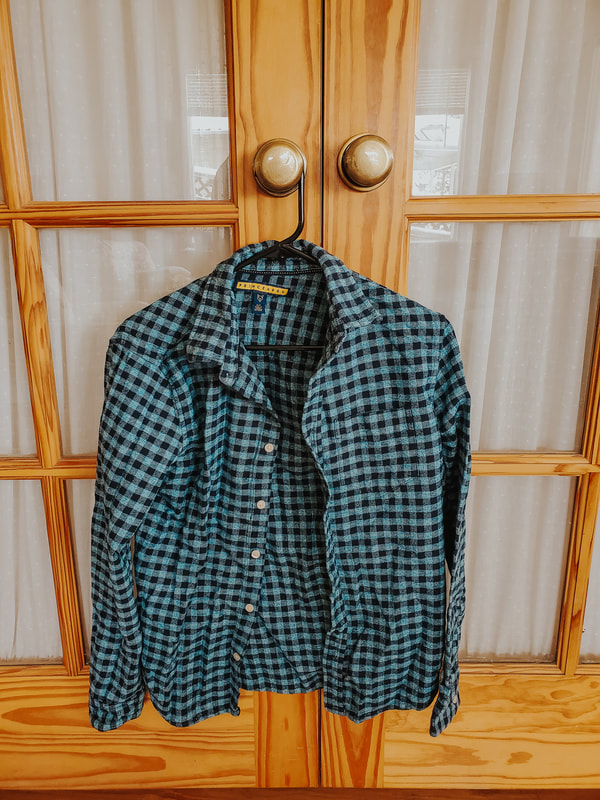
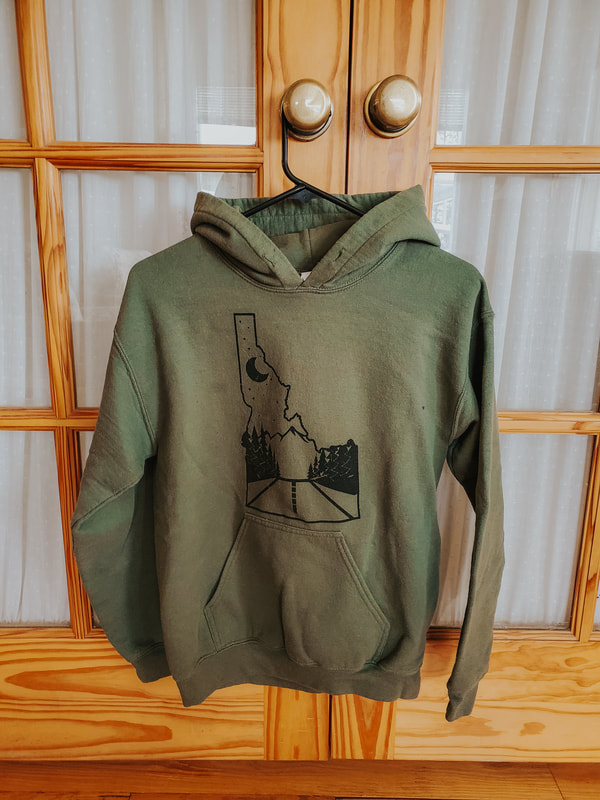
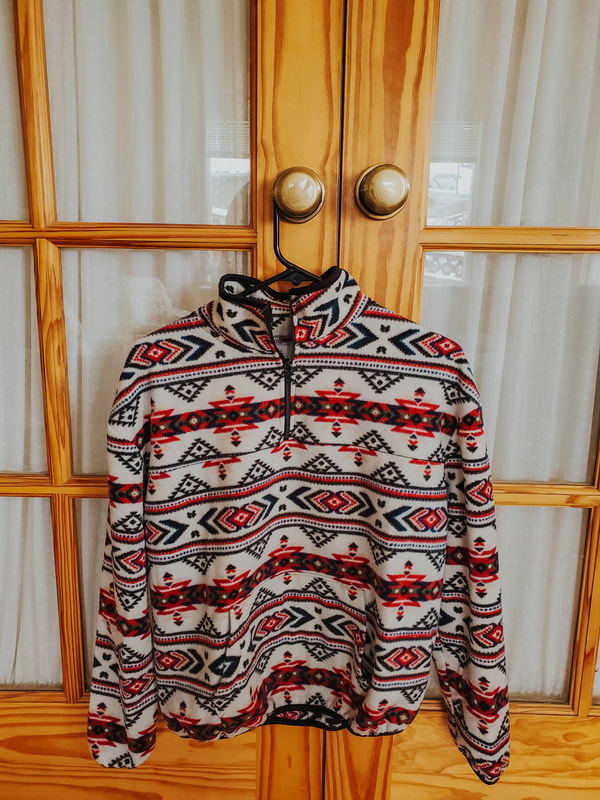
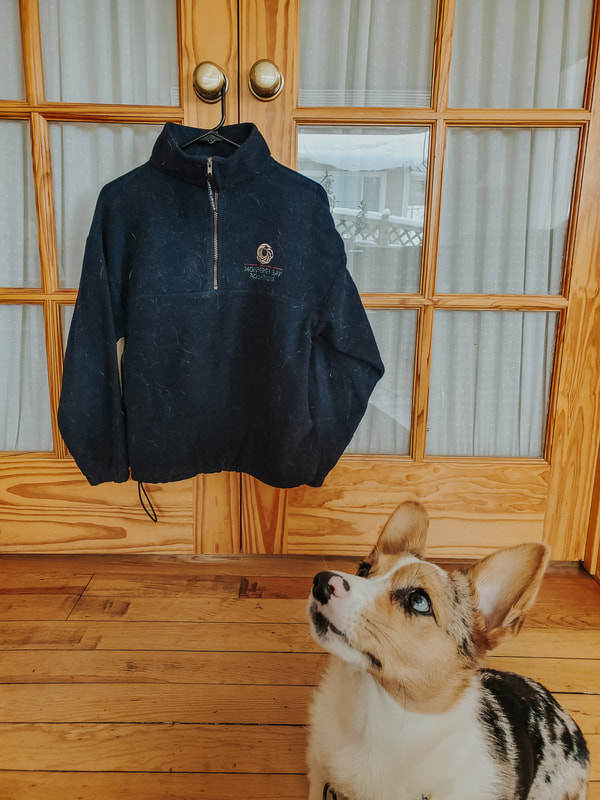
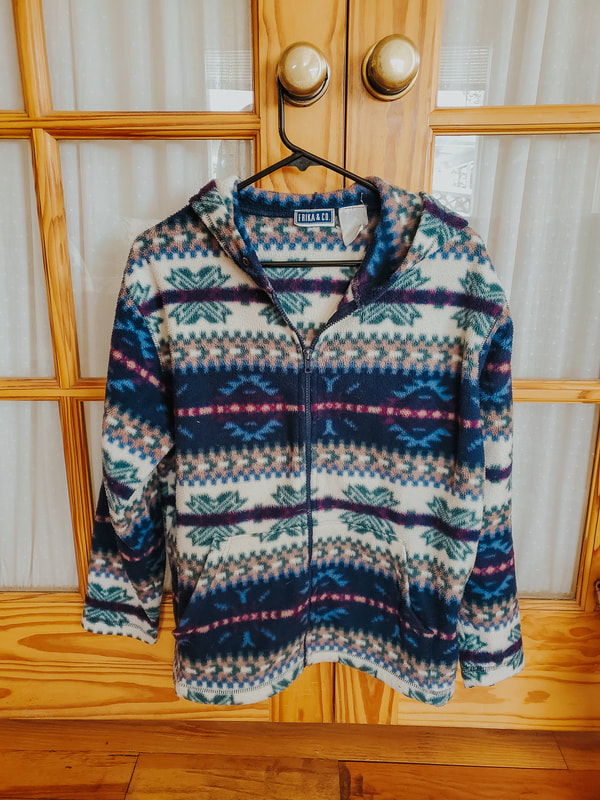
Sweatshirt Layers These are my heavier duty layers. I can layer these with the ones above or just wear them with a shirt. I wanted to have good variety because the weather isn't always going to be nice. I also didn't want to pack too many because it's still summertime. Also, the navy blue one is covered in Sophie hair so I made her pose in front of her handy work.
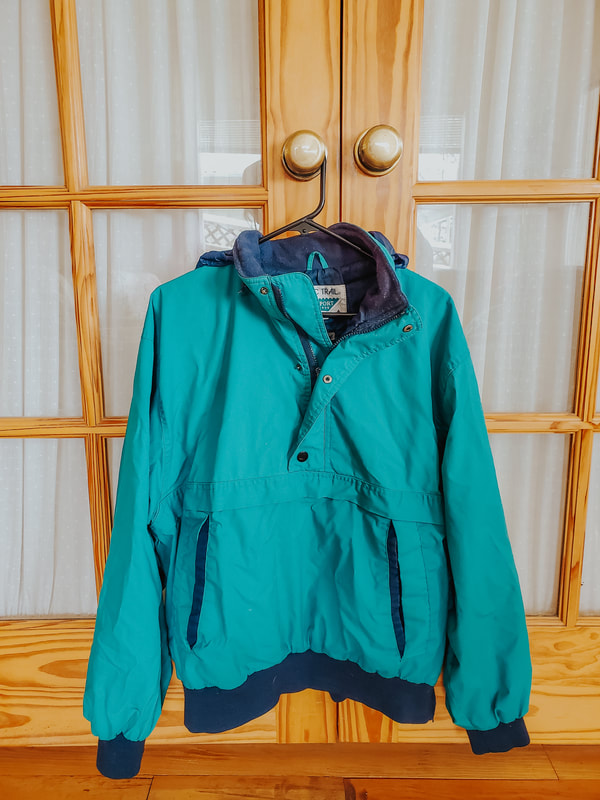
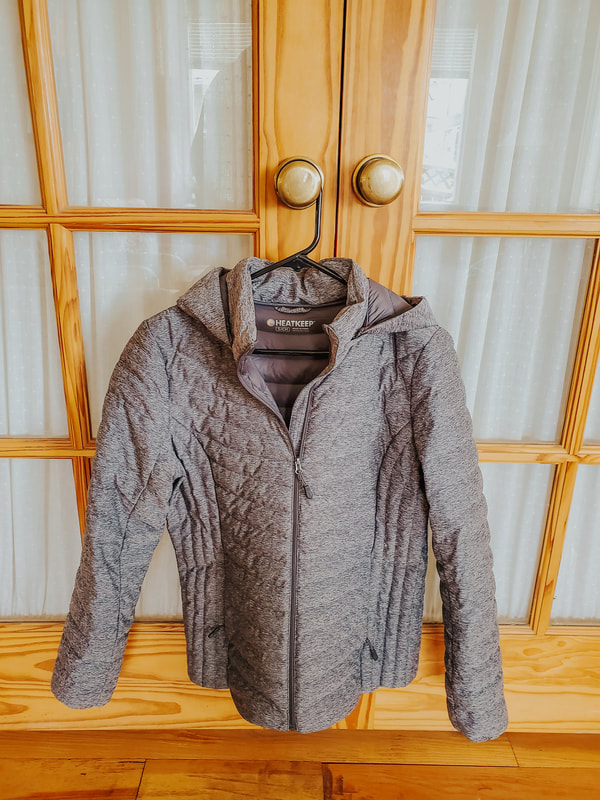
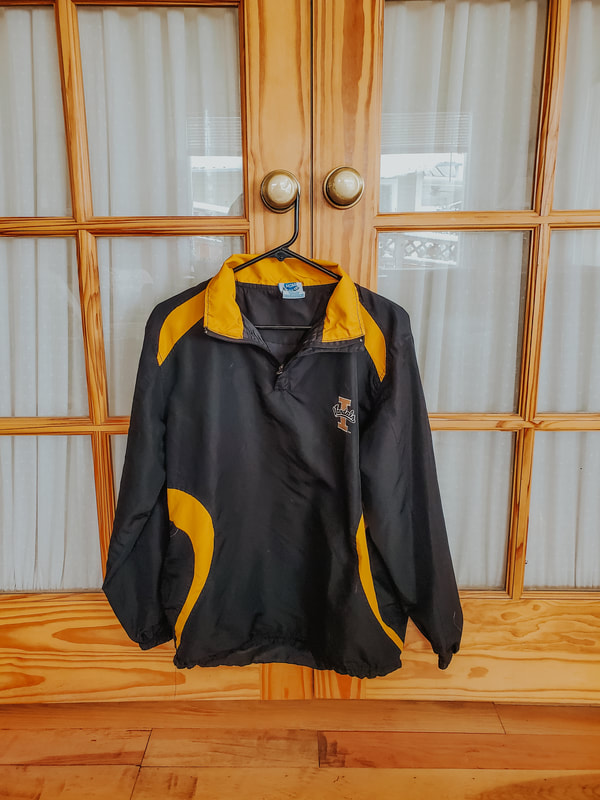
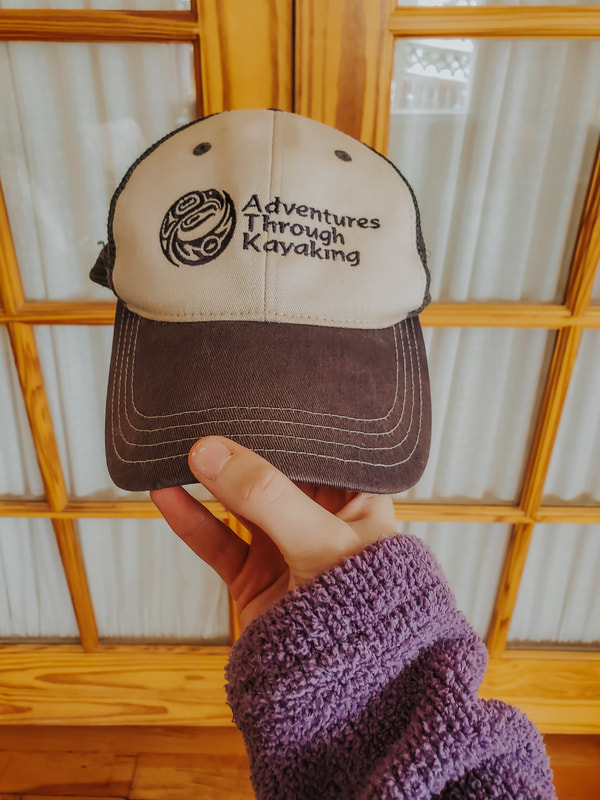
Outer Layers smThese are my heavy duty, outer layers. First, I have my teal coat. This is a mid-weight coat I found thrift shopping. It's super comfy and made of tough material. I love buying cheap coats at thrift stores because I'm not as worried about damaging them. I feel a lot better about carrying around my sand and salt water covered dog in a coat like that. My next one is a down coat that fits in a small bag. This is perfect for hiking because I can easily tuck it away and it's super warm. It's also a nicer and more expensive coat. I love it but I only break it out when I know I won't damage it. Like I'll wear it on a well established trail but wouldn't go huckleberry picking in the bushes with it. Next I have my University of Idaho windbreaker. This is another one of my thrift store finds. It has no extra insulation and is exclusively a windbreaker. It's been perfect in so many circumstances. One of the best uses is layering. It's another one I'm not too worried about staining or tearing. I've worn it many times over a nice coat like the gray one. I get the warmth of my down coat but my cheap thrift store find protects it. I do the same with my teal coat but it's better for worse weather. Both the teal coat and Idaho windbreaker are a size too big so it's easy to fit the gray coat underneath. Lastly, I have one of the only two hats I ever wear. I wear a whale stocking cap and a kayaking trucker hat which also happens to be one of the best ways to describe my interests. We may be luxury camping but we're still camping. I'm not about to do my hair everyday and I will embrace the camping hair look.
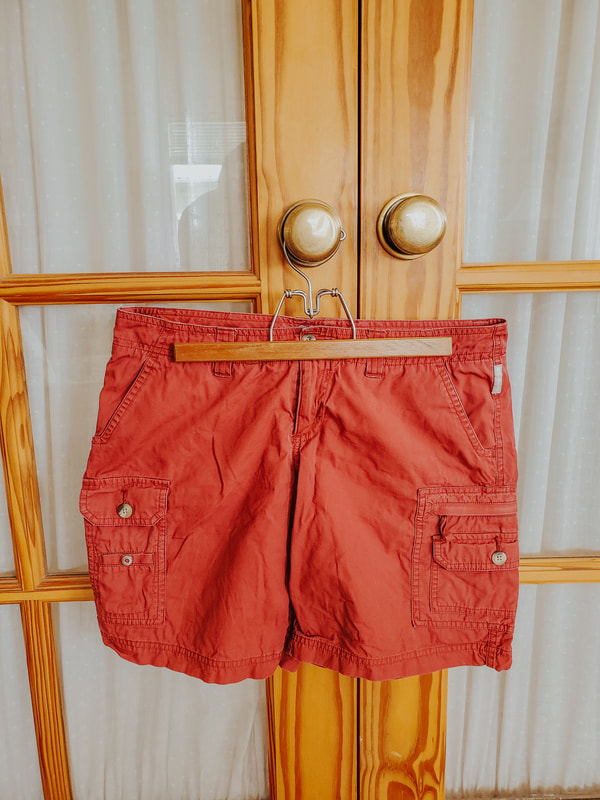
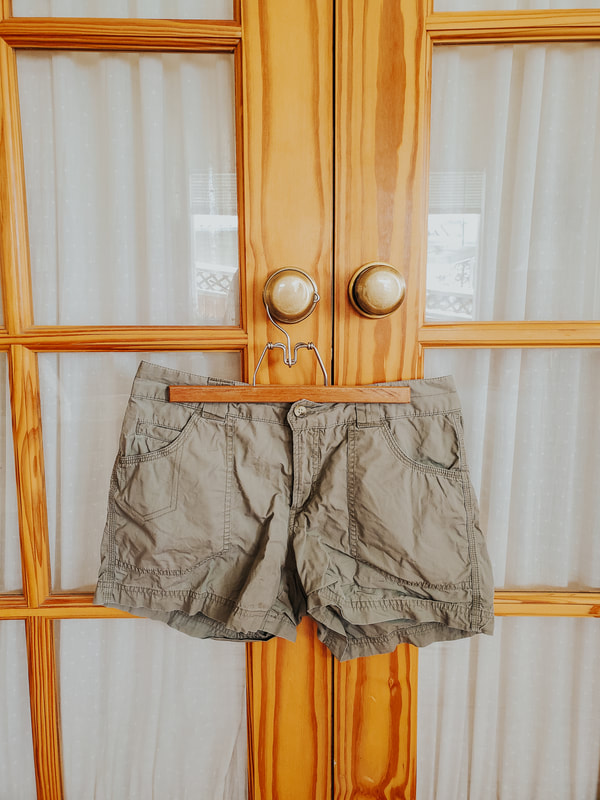
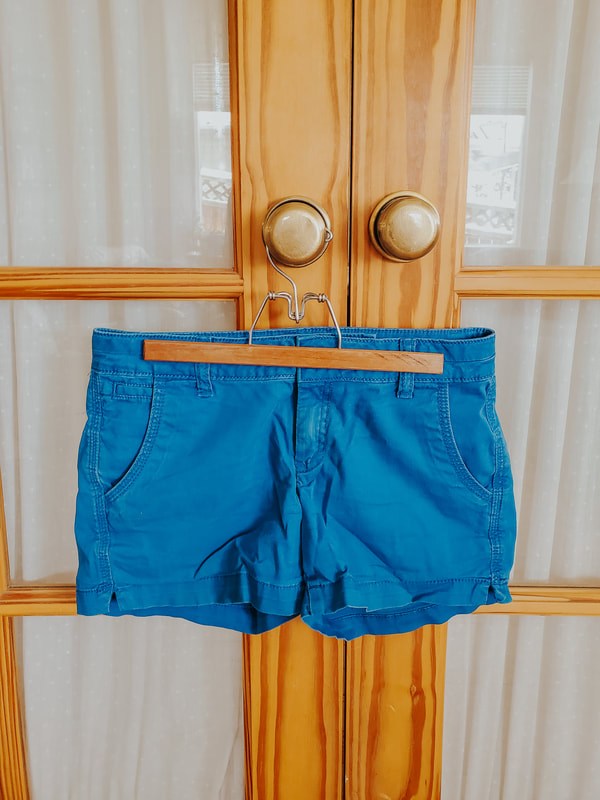
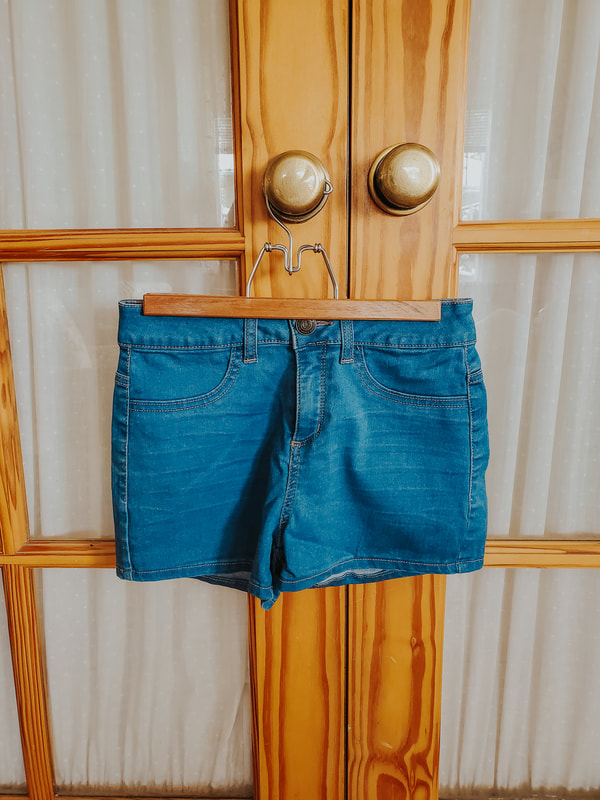
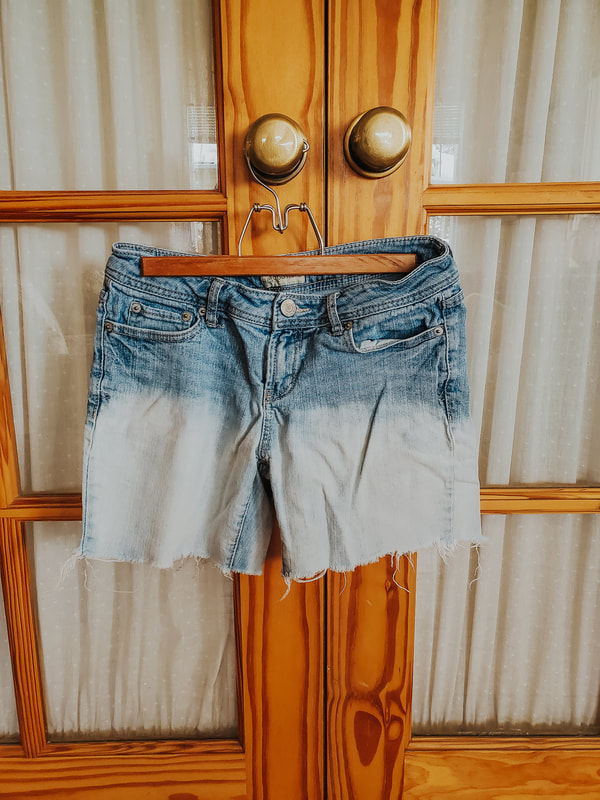
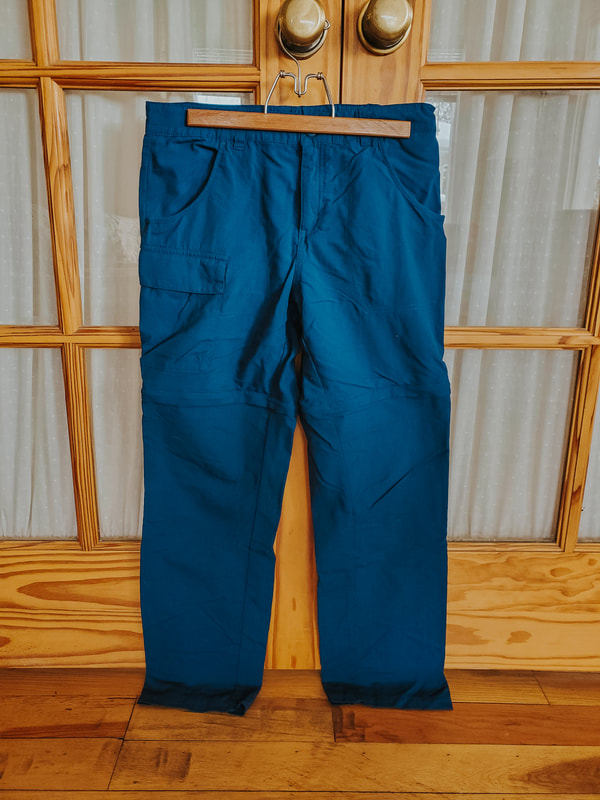
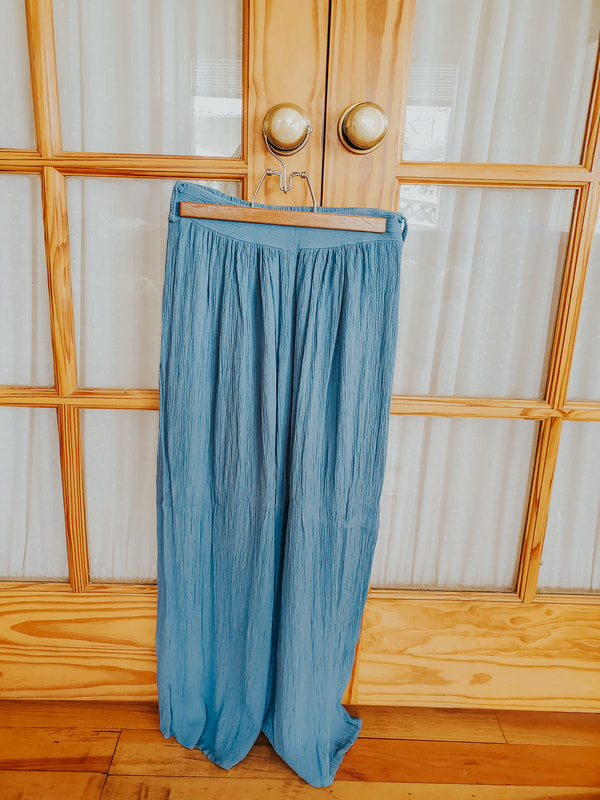
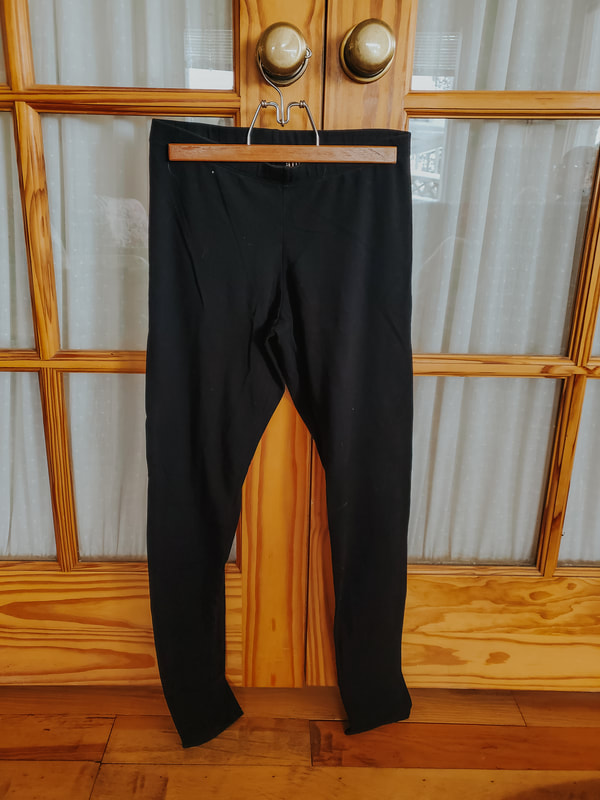
Pants Layers I have this weird thing where my legs never get cold. So I have a million layers for my top and not in pants. I made sure to bring a wide variety for this. The first group of clothes is shorts. I have hiking/cargo type shorts and jean shorts. I got the Columbia hiking shorts for a steal at a thrift store (I almost exclusively shop at thrift stores and it's very apparent in my wardrobe). Apparently someone my size dropped off their fancy brand shorts and I felt like I won the lottery. These are also in some different colors so it gives me some more variety. Next I have jean shorts. These can match anything and will work great for mid-range warm days. These will also look better when we're in places like San Fransisco. I guess I can't spend the entire trip looking like a mountain hippie. The shredded jean shorts are my sister's art project. She cut off her old jeans and bleached them. They're now my "I don't care what happens to these" shorts. Bring something like this camping. Traveling in an RV with a dog doing outdoor activities all day can destroy clothes. For pants, I'm bringing normal jeans and Columbia zip-off hiking pants (and they're definitely in child size because apparent zip offs aren't cool enough for adults). The jeans are just a must. The zip-off pants are the best thing ever. They're light duty, dry quickly, and can turn into shorts. They're great for hikes in the forest when it's a little colder. I have my flowy pants that I found in Venice. Super comfy and cool for hot days but not hiking in the dirt ready. Lastly, I have a plain black pair of leggings. Not only do they go with everything but I can use them as a second layer with jeans if it's especially cold.
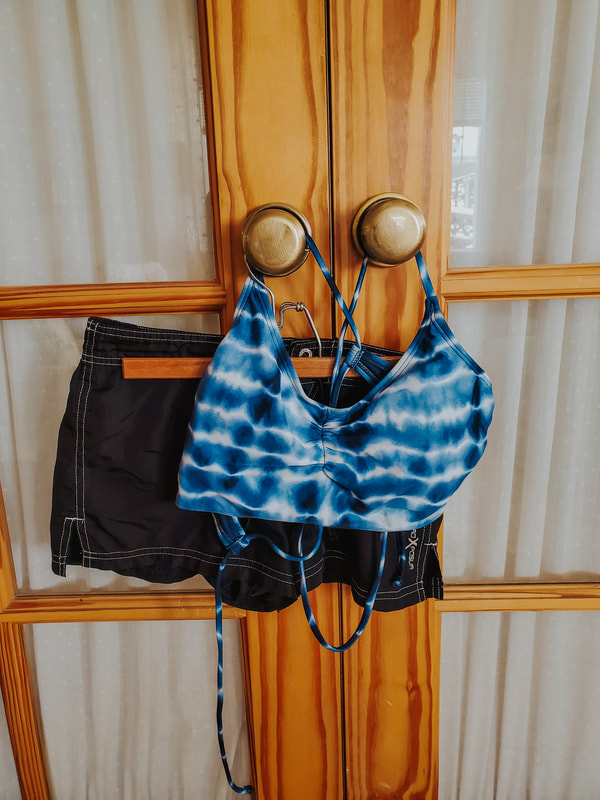
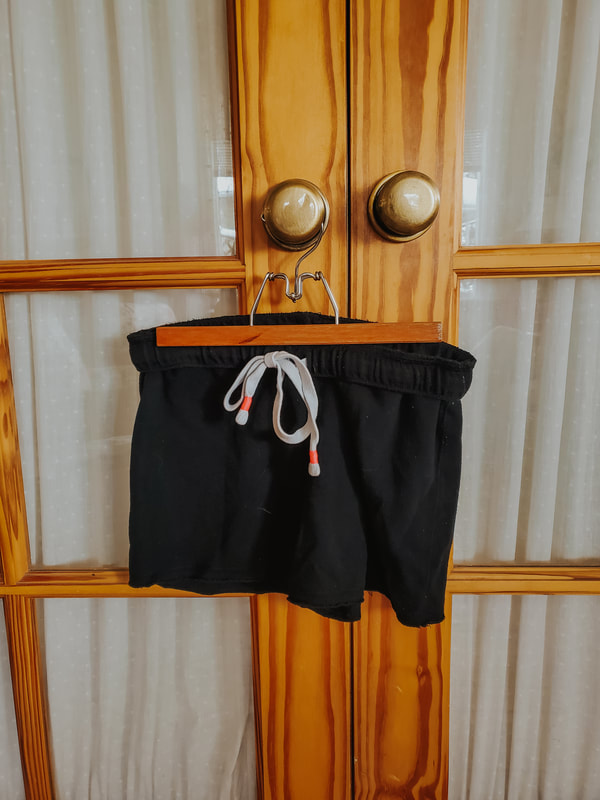
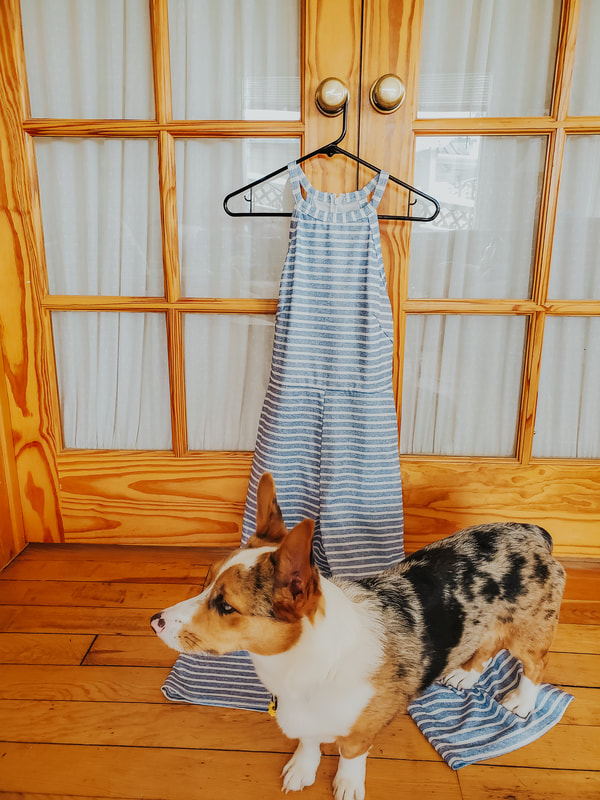
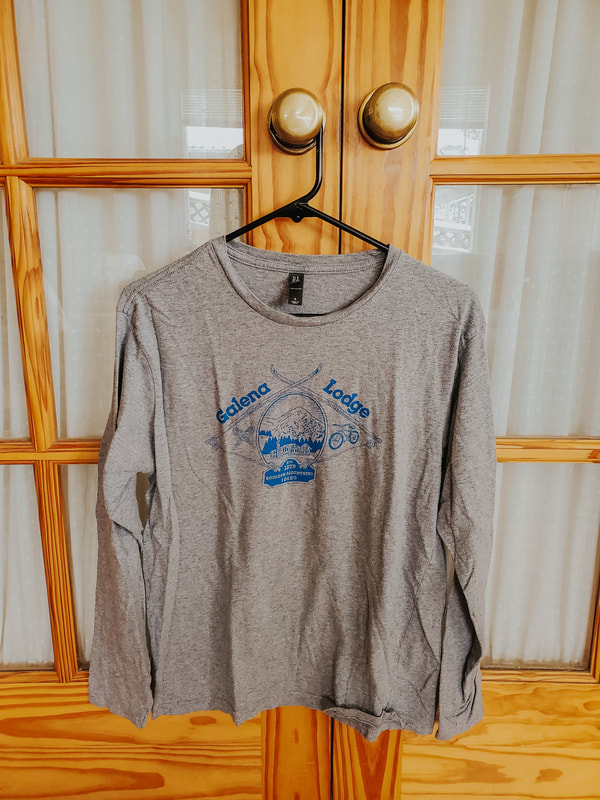
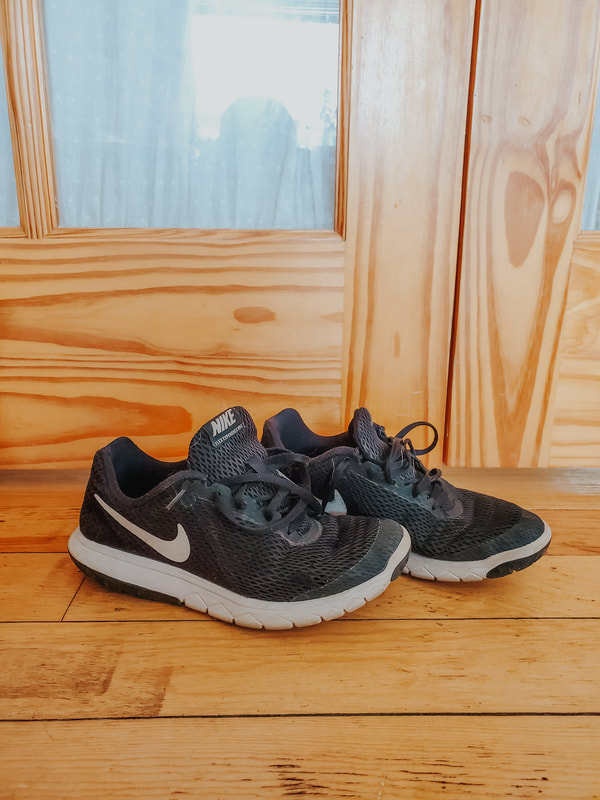
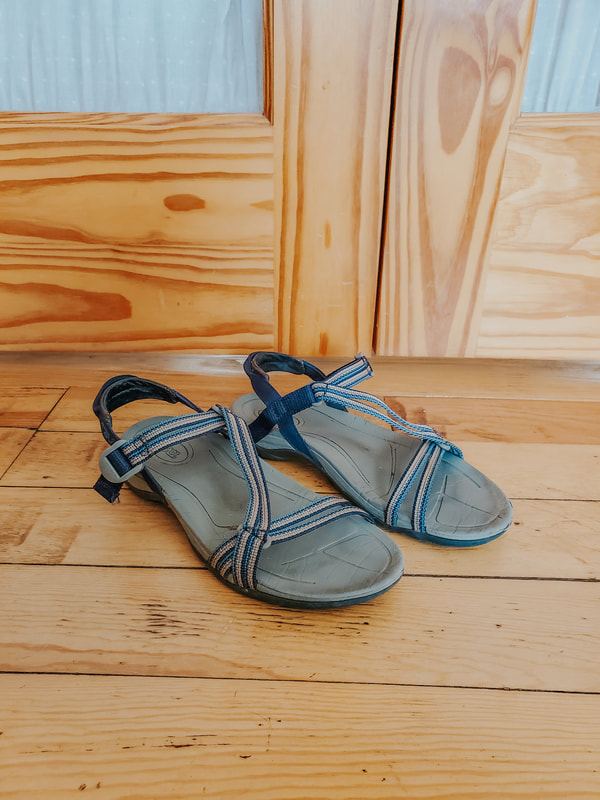
Other Items Here's my last random items I'm packing. I have my swim suit and I'm only bringing one because I'm not much for swimming. I also have two relaxing shorts. They can multi-task as PJs, driving day shorts, or a comfy outfit for a lazy day. I have my purple striped romper that my sister-in-law found for me at a thrift store. It's super comfy and light duty. I wore it a ton in Europe when it was 90 degrees. I definitely can't hike in the dirt with this but it'll be nice for driving days, running errands, or exploring a town. Then I have two long sleeves. One is a thicker, cotton long sleeve for cold days. The other is a dry fit that's great for avoiding sun burn. It's a whole lot easier to cover places the sun can burn over trying to put on sunscreen everywhere multiple times in the day. Then I have my shoes because I'm type A and I can't break my current photo pattern. I have black Nike tennis shoes for light duty hiking. I have my Teva sandals which are one of my favorite shoes I've ever owned. Which is also why they look gross and dirty in their photo. Not pictured are my hiking boots. I intend on bringing these or trying to find a lighter pair of hiking shoes. My boots can get pretty warm in the summer so I'm seeing if I can find exactly what I want. If I can't, I'd rather just use my current boots than waste money on less than ideal shoes.
|
Miki & BobWe're an adventurous couple that travel internationally and travel nationally in our RV. We have a corgi named Sophie that comes along on our adventures. Our goal is to encourage others to travel and show genuine travel over Instagrammable travel. CategoriesArchives
April 2020
|


 RSS Feed
